How to Grow Carrots From Seeds in Pots (The Pot Depth Rule Nobody Mentions)
- Container gardening
- Beginner friendly
- Spring or fall sowing
- Small space
I sowed a whole packet of carrot seeds into a wide terracotta pot one March, watered it, set it on the patio, and waited.
Eighteen days of nothing. I was certain the seeds were dead. I bought a second packet, sowed it on top of the first, and walked away annoyed.
Then every seed germinated at once. Roughly 200 carrots in a 14-inch pot, none of which were going to be a carrot if I left them like that. The two things that kill container carrots almost never have anything to do with luck. They’re moisture during germination and pot depth. Get those right and the rest of this is easy.
What You Need to Know
- Pot depth: 8 inches minimum for round varieties, 12 inches for Nantes types, 15 inches for longer ones
- Seeds germinate in 14 to 21 days. One dry day during that window can reset the whole batch.
- Sow at 1/4 inch deep (basically surface). Carrot seeds need light to sprout.
- Thin to 2-3 inches apart. Use scissors at the soil line, not your fingers.
- Pick a variety bred for containers. Thumbelina, Paris Market, Little Finger, or Adelaide all work.
What You’ll Need
- A pot at least 12 inches deep and 12 inches wide (with drainage holes)
- Loose potting mix (not garden soil, not heavy compost-rich mix)
- A small bag of perlite or coarse sand
- Container-friendly carrot seeds (see varieties below)
- A few radish seeds (the row-marker trick I explain in a minute)
- Optional: a thin layer of vermiculite for topping the seeds
- Sharp scissors for thinning
Time: 20 minutes to sow, 50-80 days to harvest · Difficulty: Easy (once you stop overthinking it)
The Two Things That Kill Container Carrots Before They Sprout
Most guides treat container carrots like a simple step-by-step. Fill pot, sow seeds, water, wait. That’s not wrong, but it skips the part where most people fail.
Container carrots fail for two reasons, almost always.
One. The pot is too shallow for the variety, so the root hits the bottom, hooks sideways, and you pull up a stub that looks like a finger.
Two. The soil dried out during the two to three weeks the seeds spent germinating, and the embryos died before they cracked open. You then assume the seed packet was bad and start over.
Pretty much every other mistake (forked roots, hairy roots, weak yields) is downstream of these two. Fix them first.
Get the Pot Right Before You Get the Seed Right
The rule I use: the pot has to be at least 1.5 times the mature length of the carrot. Maryland Extension uses the same ratio.
Here’s what that looks like in practice.
| Variety type | Mature length | Pot depth minimum | Pot width minimum |
|---|---|---|---|
| Round (Thumbelina, Paris Market) | 1-2 inches (2.5-5 cm) | 8 inches (20 cm) | 12 inches (30 cm) |
| Half-long (Little Finger, Nantes, Adelaide) | 3-6 inches (7-15 cm) | 12 inches (30 cm) | 12 inches (30 cm) |
| Standard (Danvers Half Long, Chantenay) | 6-7 inches (15-18 cm) | 15 inches (38 cm) | 14 inches (35 cm) |
| Long (Imperator) | 8-10 inches (20-25 cm) | 18+ inches (45+ cm) | 16 inches (40 cm) |
Skip Imperator entirely for containers. Honestly. They underperform in pots no matter what you do, and the few that survive are forked.
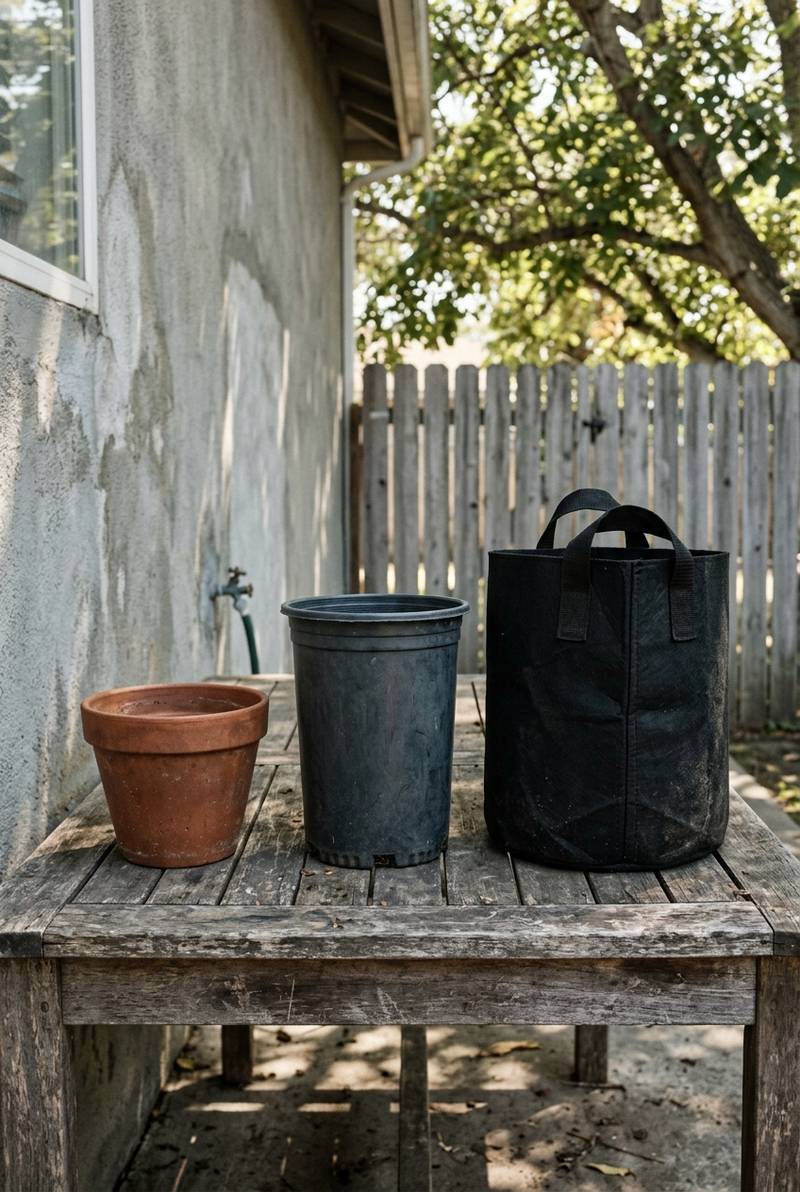
One thing nobody mentions: pot material changes how often you water. Terracotta breathes through its walls and dries out twice as fast as plastic or fabric. If your patio is hot, terracotta on concrete will cook your seedlings.
- Plastic: Holds water longest. Cheapest. Slight risk of soggy soil if you overdo it.
- Fabric grow bags: Best drainage, air-prune the roots, never soggy. My pick for carrots specifically.
- Terracotta: Prettiest, dries fastest, water daily in hot weather.
- Glazed ceramic: Sits between plastic and terracotta. Heavy. Decent.
If you’re standing in the garden center trying to decide, grab a 5-gallon fabric grow bag. That’s the easiest carrot-growing container on the market. My container gardening primer goes deeper on pot selection if you want the full breakdown.
Pick a Variety That Was Bred for This
Some carrots were practically made for pots. Some weren’t. Choosing badly is the most common reason container carrots disappoint.
Here’s my short list, organized by what you actually want.
- Thumbelina: Round, marble-sized to golf-ball-sized. Sweet, no peeling needed. Easiest variety to grow well in a shallow pot.
- Paris Market (sometimes called Parisian): Round, globe-shaped, French heirloom. Beautiful and forgiving.
- Little Finger: Slim Nantes-type, 3-4 inches, harvest young. Good for snacking carrots and lunchboxes.
- Adelaide: Baby Nantes, ready in 50 days, sweet and crisp. The variety I plant most years.
- Short ‘n Sweet: Chantenay type, 4 inches, blunt shape. Tolerates heavier soil better than most.
The first two are the safest bets if you’ve never grown carrots before. They’re shallow, they’re sweet, and they hide most beginner mistakes.
This is the method I’d go with: 5-gallon fabric pot, Adelaide or Paris Market seeds. That combination has never let me down.
Why Your Carrots Will Fork (Hint: It’s Not Stones)

If you’ve ever pulled up a carrot that split into two legs, or grew a small twisted root with a beard of fine hairs, you’ve probably been told it was a stone in the soil.
Mostly false.
Did you know
Forked and hairy carrots are usually caused by root-knot nematodes, soil-borne fungal damage to the root tip in the first three weeks, or sharp moisture swings during early growth (Gardening Know How, Iowa State Extension). A stone can cause one forked carrot. The whole pot forking is something else.
In a container you’re starting with fresh potting mix, so nematodes aren’t likely. The two things you can actually control: keep moisture steady and go easy on the nitrogen.
Here’s the mix that works:
- 3 parts loose potting mix. Not garden soil. Garden soil compacts and stunts the roots.
- 1 part perlite or coarse builder’s sand. Both work. Sand is cheaper if you can find it without limestone.
- Skip the heavy compost. A light scoop is fine. Too much compost means too much nitrogen, and your carrots will grow lush tops and tiny stubby roots.
- Optional vermiculite cap. A thin half-inch layer over the seeds prevents the soil from forming a crust when it dries. University of Wisconsin Extension recommends this for the same reason.
If you want to feed them later, use a low-nitrogen, high-potassium fertilizer (something like 5-10-10) once they’re established. Skip the all-purpose stuff. Always.
Sow Shallow, Mark Your Rows With Radishes
Carrot seeds are tiny. Annoyingly tiny. The temptation to dump a whole packet into the pot is real, and basically everyone gives in the first time.
Don’t.
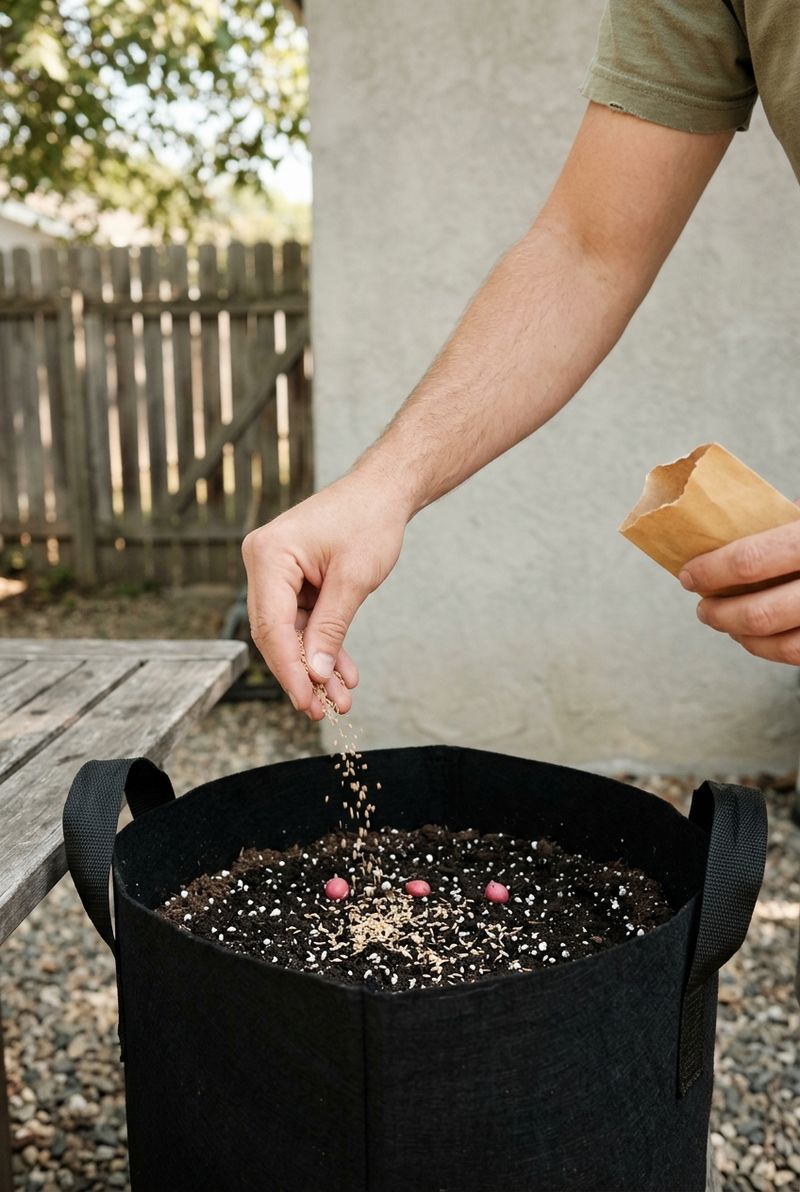
Sprinkle seeds across the surface aiming for one seed per inch (2.5 cm). Press them down gently with your palm. Cover with no more than 1/4 inch of soil or vermiculite. Deeper than that and they won’t sprout. Carrot seeds need a little light to germinate.
Now the trick that experienced gardeners use and beginners rarely hear:
Tip
Mix a few radish seeds in with your carrot seeds when you sow. Radishes sprout in 3 to 5 days, which marks the rows so you don’t disturb them during the long carrot wait. They also break the soil crust as they push up, which helps carrot sprouts emerge. You pull the radishes around week 3, right when the carrots need the extra space. Iowa State Extension and Mississippi State Extension both recommend this.
I learned this trick the year after my eighteen-day-of-nothing disaster. It changed everything (genuinely).
Water gently with a spray bottle or fine rose so you don’t blast the seeds out of the soil. I know how that sounds, but the first time I used a regular watering can I floated half the seeds to one corner of the pot.
The Two Weeks of Nothing (And Why That’s Normal)

Carrot seeds are the slowest-germinating common vegetable. Tomatoes pop in 5 to 7 days. Lettuce, 7 to 10. Carrots take 14 to 21 days, and at cooler soil temperatures they can take longer.
The reason: carrots have a hard, oily seed coat (same family as parsley and parsnip) that water has to soak through before the embryo can push out. Any dry spell sets that clock back to zero.
Two rules during this window:
- Soil temperature between 55 and 75°F (13 and 24°C). Above 85°F (29°C) germination drops sharply. Below 50°F (10°C) you’ll wait forever.
- Soil stays evenly moist, never dry. Mist daily. Check by sticking your finger in up to the second knuckle.
Some growers cover the pot with damp burlap, cardboard, or a sheet of newspaper until they see green tips, which holds moisture beautifully.
Common mistake
The burlap/cardboard trick works, but the damp, dark space underneath becomes prime real estate for earwigs and pillbugs. Check daily, lift the cover the second you see sprouts, and never leave it on once the seedlings are up. I lost a whole pot to earwigs once because I forgot to check.
The Thinning Cut Beginners Skip (And Then Regret)
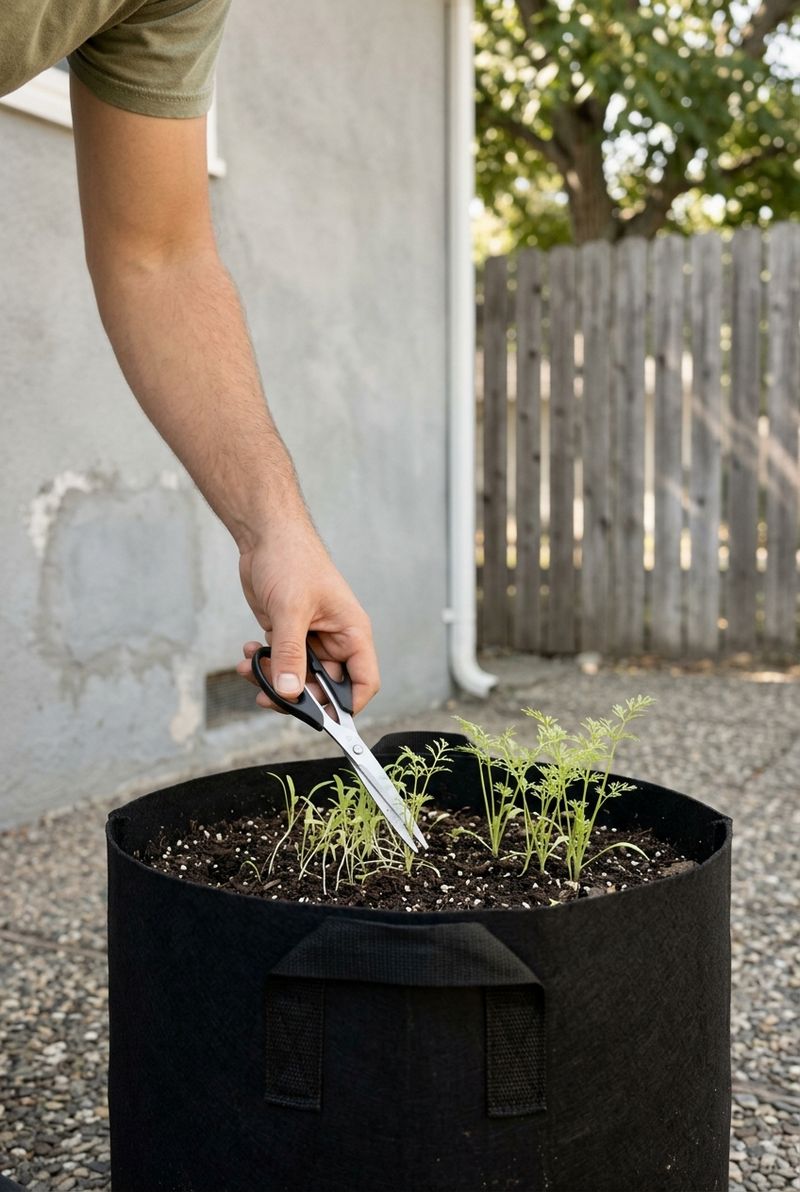
When your seedlings hit 2 inches (5 cm) tall, you have to thin them. There is no way around this.
I know. They look so small and innocent and you grew them from a seed and now I’m telling you to murder most of them with scissors. I get it. I skipped my first thinning out of guilt and pulled up a pot of tangled, pencil-thin nothing two months later. Worth it once. Not worth it twice.
Use sharp scissors. Cut the weaker seedlings off at the soil line. Don’t pull them. Pulling disturbs the neighbors and their delicate root tips, which is what causes most forked carrots.
Spacing depends on the variety:
- Thumbelina, Paris Market: 1.5 to 2 inches apart (4-5 cm)
- Little Finger, Adelaide, Nantes types: 1.5 to 2 inches apart
- Danvers, Chantenay: 2 to 3 inches apart (5-7.5 cm)
You’ll feel like the pot looks too empty afterward. It’s supposed to. Each remaining seedling needs room to make a real carrot, not share space with eight neighbors.
The thinnings themselves are edible. Toss them in a salad or onto a sandwich. They taste like very young carrot greens (which is exactly what they are).
From Pencils to Pulled-Up Carrots: What to Expect
From thinning forward, the work mostly stops. Carrots are a quiet crop.
Water about 1 inch (2.5 cm) per week, more often in hot weather, less when it’s cool. Keep an eye on the surface of the soil rather than guessing. Stick a finger in. If the top inch is dry, water until you see drips out the bottom.
Around the halfway point of growth, you’ll start to see the orange shoulders of the carrots push up above the soil. Cover them with a little extra mix or some mulch. Sun on exposed shoulders turns them green and bitter.
Here’s the timeline by variety.
- Round types (Thumbelina, Paris Market): 50 to 65 days from sowing
- Half-long (Little Finger, Adelaide, Nantes): 60 to 75 days
- Standard (Chantenay, Danvers): 70 to 80 days
Two days before harvest, ease back on the water. Soil that’s too wet at pull-time means carrots that split or crack as they come out.
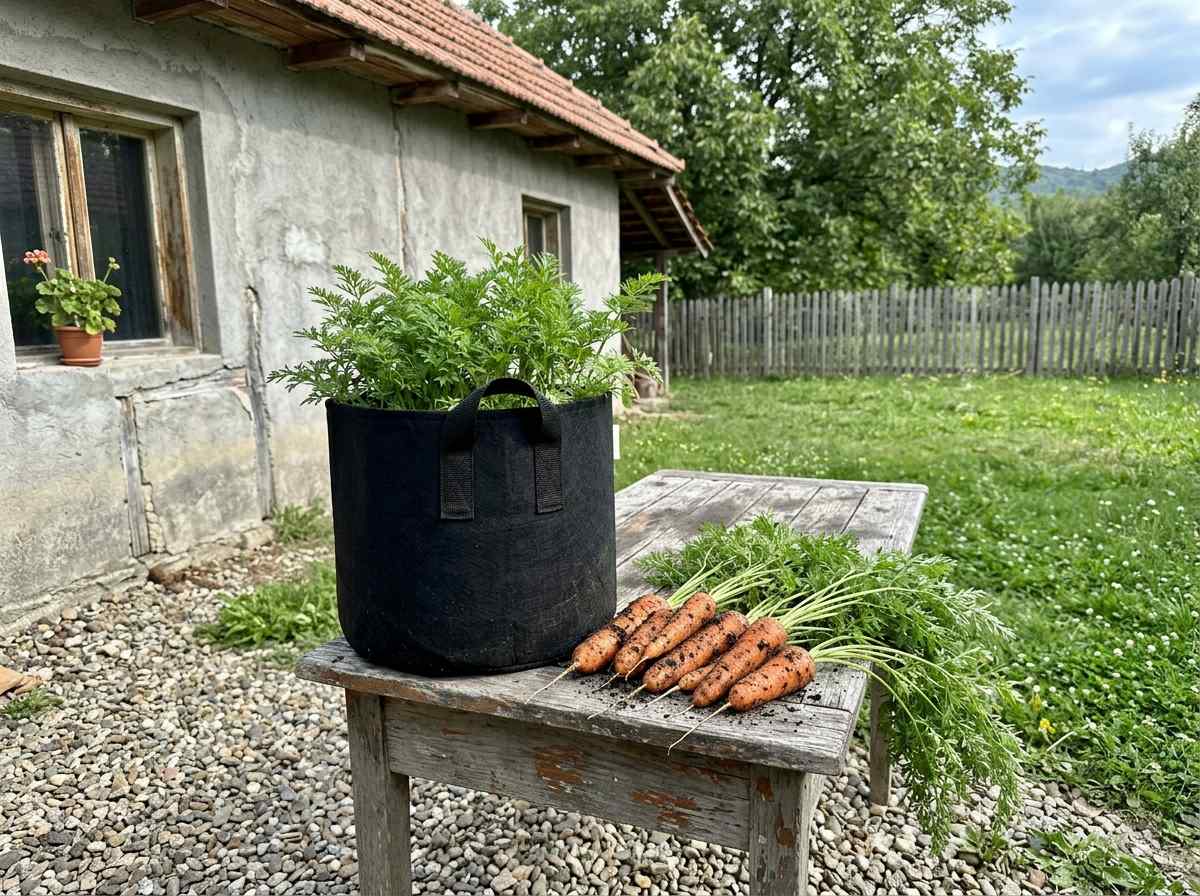
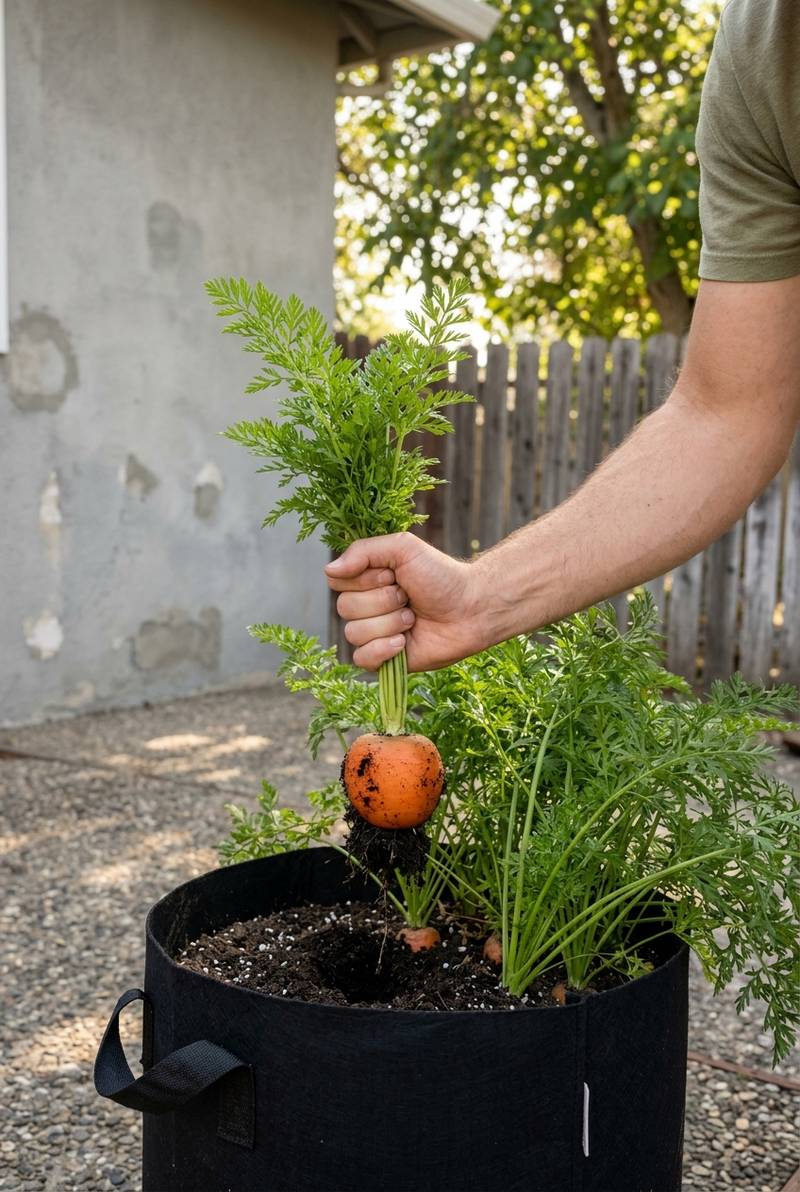
To harvest, grip the green tops near the soil line and pull straight up with a slight twist. Roots out of a fabric pot come up cleaner than out of a plastic one (the fabric flex helps).
One thing nobody warned me about: container carrots taste sweeter than the ones I’ve grown in the ground. The consistent moisture and clean soil seem to concentrate the sugar somehow. The first time I pulled a Paris Market and bit into it standing over the pot, I genuinely couldn’t believe a homemade carrot tasted like that. If you’re new to growing edibles from seed, my tomato-from-seed guide is a good companion for spring sowing.
Get the depth right, keep the soil damp through germination, thin without flinching, and the rest of this is mostly just patience and a watering can.