How to Grow an Avocado Tree From a Pit (And What It’ll Actually Do)
- Indoor houseplant project
- Beginner friendly
- Two methods compared
- Patience required
I had three avocado pits balanced on toothpicks above three jam jars on my kitchen windowsill. All three rotted.
The water turned cloudy, then brown. One pit developed a soft spot that smelled like a vegetable drawer I’d forgotten about. I threw all three away and felt vaguely embarrassed, because the toothpick method was supposed to be the easy one.
Turns out the pretty method everyone shows on Pinterest is not the reliable method. The soil approach germinates roughly three times more often than the floating-in-water version. Here’s the whole process, from picking the right pit to the day your seedling actually looks like a tree.
The Short Version
- Skip the toothpick method. Plant the pit directly in soil instead.
- Peel the thin brown skin off the pit before planting. It shaves weeks off germination.
- Expect 3 to 12 weeks before you see a sprout. Some pits never sprout at all.
- Give it 6 to 8 hours of bright light, ideally a south or west window.
- This is a beautiful houseplant project, not a fruit tree project. Indoor avocados almost never fruit.
The Toothpick Method Almost Killed My First Three Pits
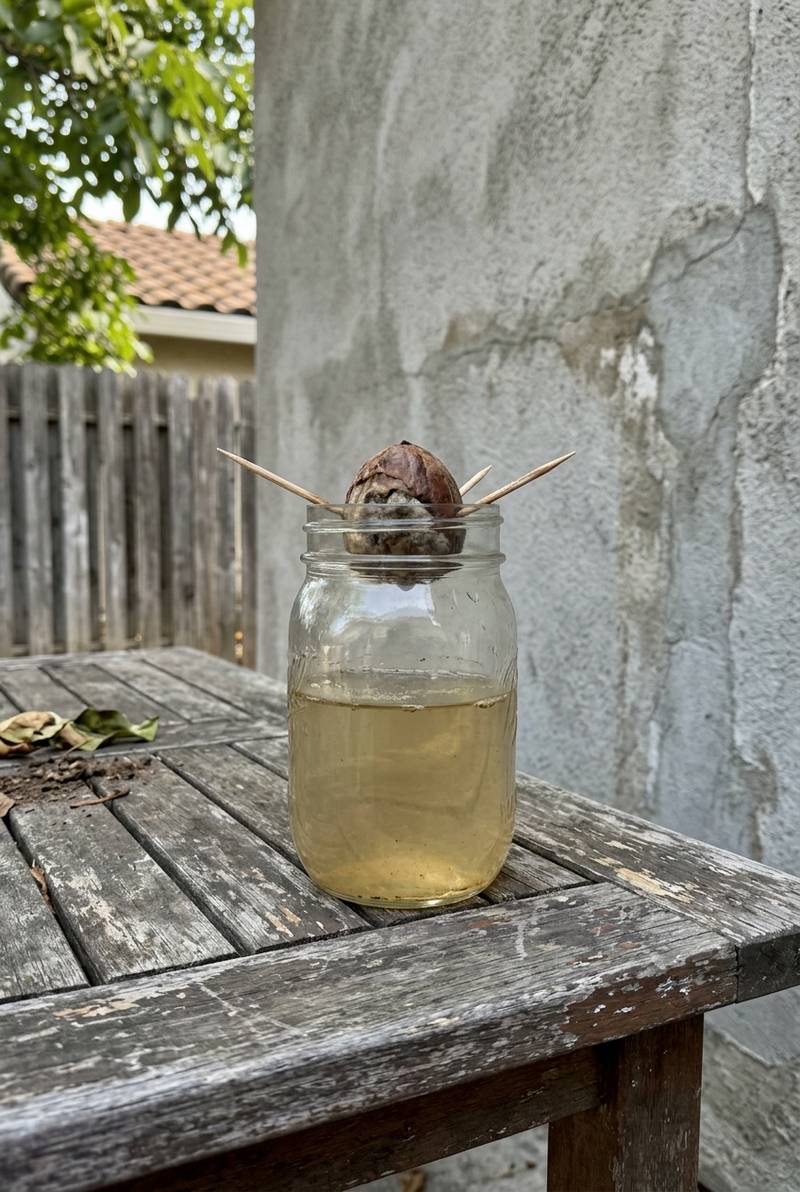
You’ve seen the image. A brown pit suspended over a glass of water, three toothpicks stuck into its sides, a single root dangling underneath. It’s iconic. It’s also unreliable.
One controlled germination test put soil at 87.5% success and water at 25% success over six months. Extension offices echo this. Nebraska Extension flat-out says soil “will provide faster results,” and Botanopia, which tests these things obsessively, ranks water last.
The toothpick method exists because it’s pretty to watch. You can see the root. You can see the crack. It’s a science-fair vibe in your kitchen, and I get the appeal.
But the water sits there, oxygen drops, and the pit rots before it splits. That’s what happened to mine.
Common mistake
If you go with the water method anyway, change the water every two to three days. Stagnant water is the single biggest killer here. A cloudy glass is a rotting glass.
Pick a Better Pit Than Your Grocery Hass
The pit you use matters more than the method.
Mass-market supermarket Hass pits are notoriously inconsistent. They’ve been cold-stored for weeks, sometimes treated, and a fair number of them won’t sprout no matter what you do. Caribbean varieties from a Latin grocery (the bigger, thinner-skinned ones) tend to germinate more reliably in my experience.
Either way, here’s what to look for:
- A fresh pit. Cut from a ripe avocado you ate this week. Old pits sitting in a fruit bowl are usually dead.
- The bigger, the better. Large pits hold more energy and tend to push out a root faster.
- No knife nicks. If your blade scored the pit when you cut the avocado, it’ll often rot. Set that one aside.
- Clean it carefully. Rinse off any green flesh under cool water, but don’t scrub. The brown coat is doing a job (until you decide to remove it. More on that in a second).
Let the pit air-dry on a towel for 24 to 48 hours before you do anything else. This firms the surface and makes the next step easier.
Peel the Brown Skin (The Trick Nobody Talks About)
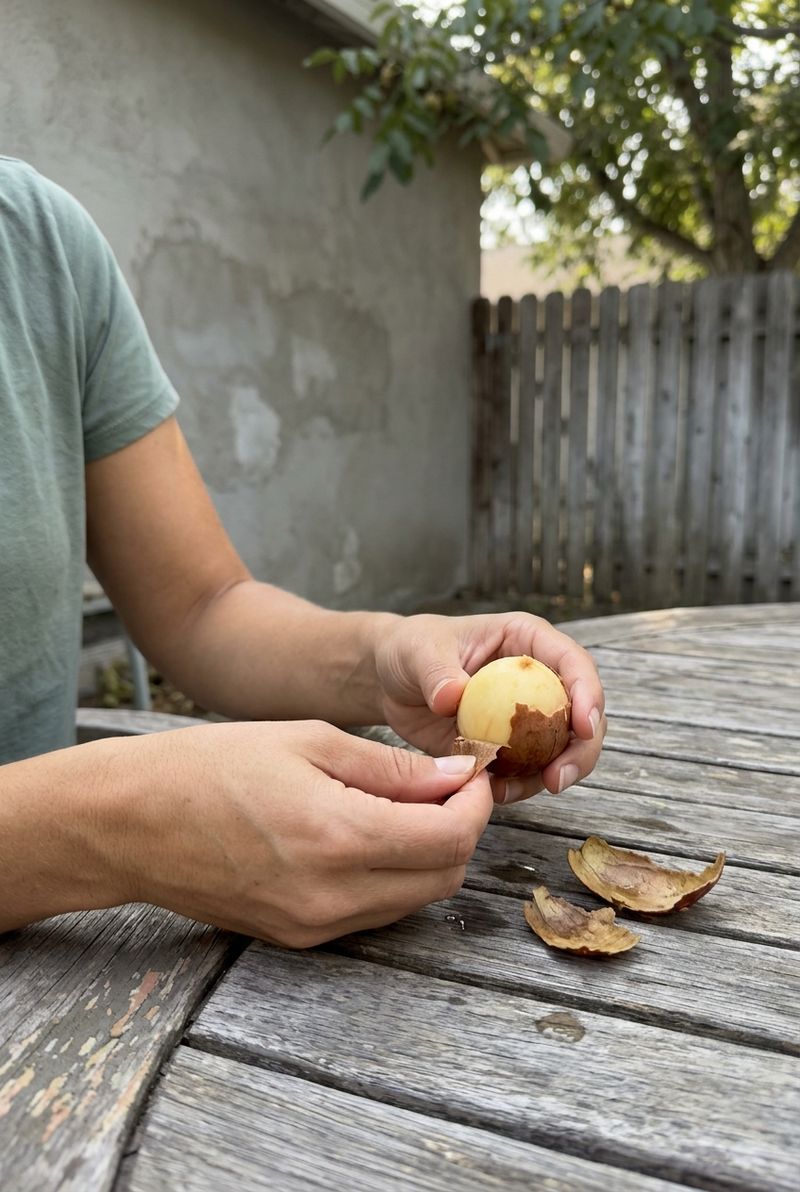
Almost every avocado tutorial I’ve read skips this part. It’s the single most useful thing I’ve learned about growing avocado pits.
Peel the thin papery brown skin off the pit before you plant it. UC ANR’s “Spill the Beans” blog notes that removing the seed coat “appears to hasten germination,” and Botanopia’s tests cut germination time by roughly three to four weeks.
To do it, soak the pit in warm water for an hour. The skin softens. You can usually peel it off in two or three pieces with your fingernails, like the world’s most boring egg.
Underneath you’ll see a smooth, slightly yellow-cream surface. That’s the actual seed. Skin off, mold has nowhere to grow, and the embryo cracks open faster.
Tip
If a piece of skin won’t come off, leave it. Don’t dig at it with anything sharp. A torn pit invites rot more reliably than an intact skin slows germination.
Two Ways to Wake Up an Avocado Seed

Here are the two methods side by side, with honesty about what each one is good for.
| What you compare | Water (toothpick) method | Soil method |
|---|---|---|
| Success rate | ~25% (Botanopia / Scott trials) | ~85-90% |
| Time to sprout | 6 to 12 weeks | 3 to 8 weeks |
| Mess level | Cloudy water, light smell | Just a pot of soil |
| You can watch it | Yes, that’s the appeal | No, it’s a surprise |
| Best for | Kids and curiosity | Actually growing a tree |
If you only do one, do soil. This is the method I’d go with every time.
Here’s the soil setup. Use a small pot, around 4 to 6 inches (10 to 15 cm) wide, with drainage holes. Fill it with a basic houseplant mix that drains well. A handful of perlite stirred in helps if your mix feels heavy.
Plant the pit pointy-side up, flat-end down, with the top third sticking out of the soil. Water it lightly so the soil is damp but not soggy. Put the pot somewhere warm. The ideal range is 65 to 85F (18 to 29C), with 77F (25C) being the sweet spot.
Keep the soil consistently damp. Not wet. Damp. Check it every few days with a fingertip, and water when the top inch feels dry.
If you’d rather start in water (I know the appeal), use a clear glass and the toothpicks just to suspend the pit so the bottom third sits in water. Change the water every two to three days, and as soon as a root hits 3 inches (7.5 cm) and a stem appears, move the pit into soil. Don’t wait longer. Water-grown roots are fragile, and the longer they live in water, the harder the soil transition becomes. For a primer on getting any container set up right, my container gardening guide covers the soil basics that apply here too.
Save this to PinterestWhen the Seedling Looks Sad (And Why That’s Usually Light, Not Water)
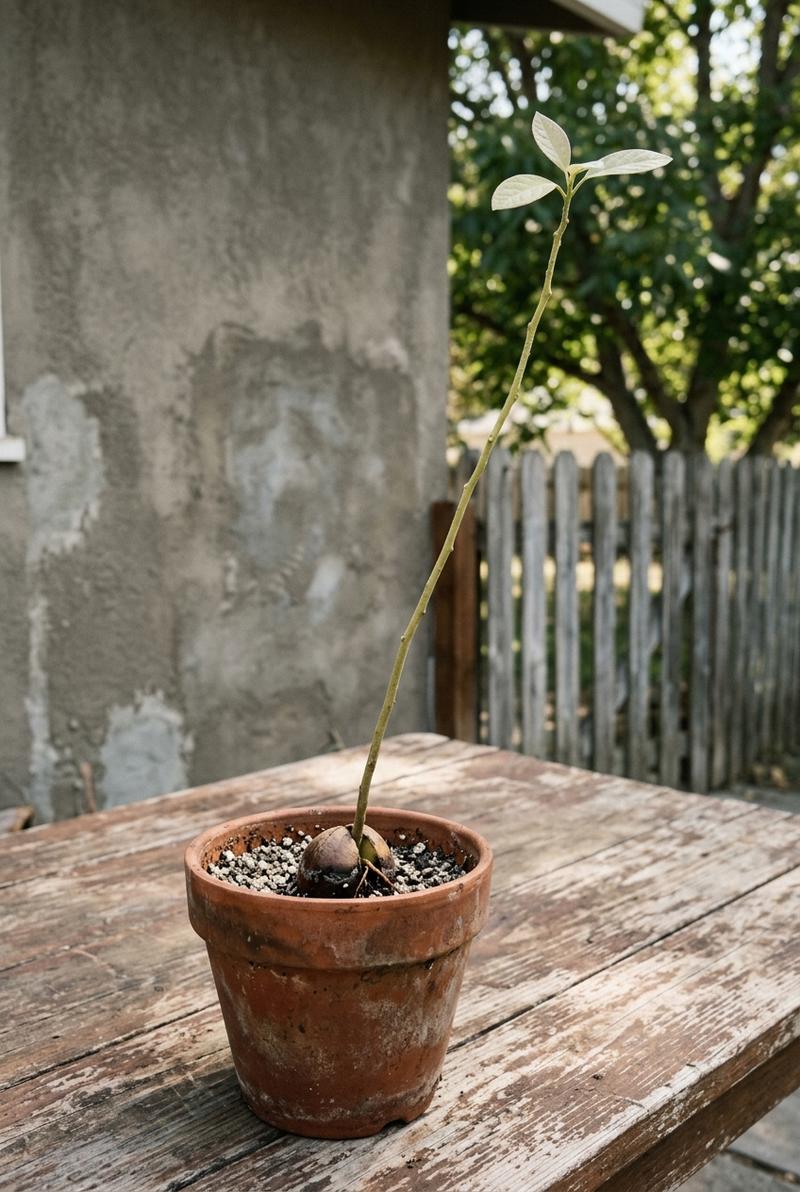
Your pit cracks. A root pushes down. A pale green stem pokes up. You feel briefly invincible.
Then a month later the stem is a foot tall, leaning like a teenager, with two small leaves at the top and a long bare neck. This is the most common avocado problem on the internet, and it is almost never a watering issue.
Leggy growth means not enough light. Avocados want 6 to 8 hours of bright direct sun a day. A north-facing window won’t do it. An east window is borderline. A south or west window is what you want.
If you don’t have one, a basic LED grow light hung 12 inches (30 cm) above the plant for ten hours a day fixes the problem. I’d put one in before I’d buy a fancier pot.
The leaf signals are worth memorizing:
- Curled, drooping leaves with soft stems. Overwatering. Let the top 2 inches (5 cm) of soil dry out, then ease back.
- Dry, crispy edges with leaves dropping. Underwatering. Water more deeply, less often.
- Brown leaf tips on otherwise healthy leaves. Tap water salts or low humidity. Try filtered or rainwater for a month and see.
- Pale, yellow-green leaves overall. Either not enough light or hungry for nitrogen. Light first. Always.
The first one I grew sat in an east window and grew sideways toward the brightest patch of sky like a periscope. Once I moved it to a west window, the new growth came in straight. Same plant, different room. That’s how much light matters here.
The Pruning Cut Everyone’s Afraid to Make
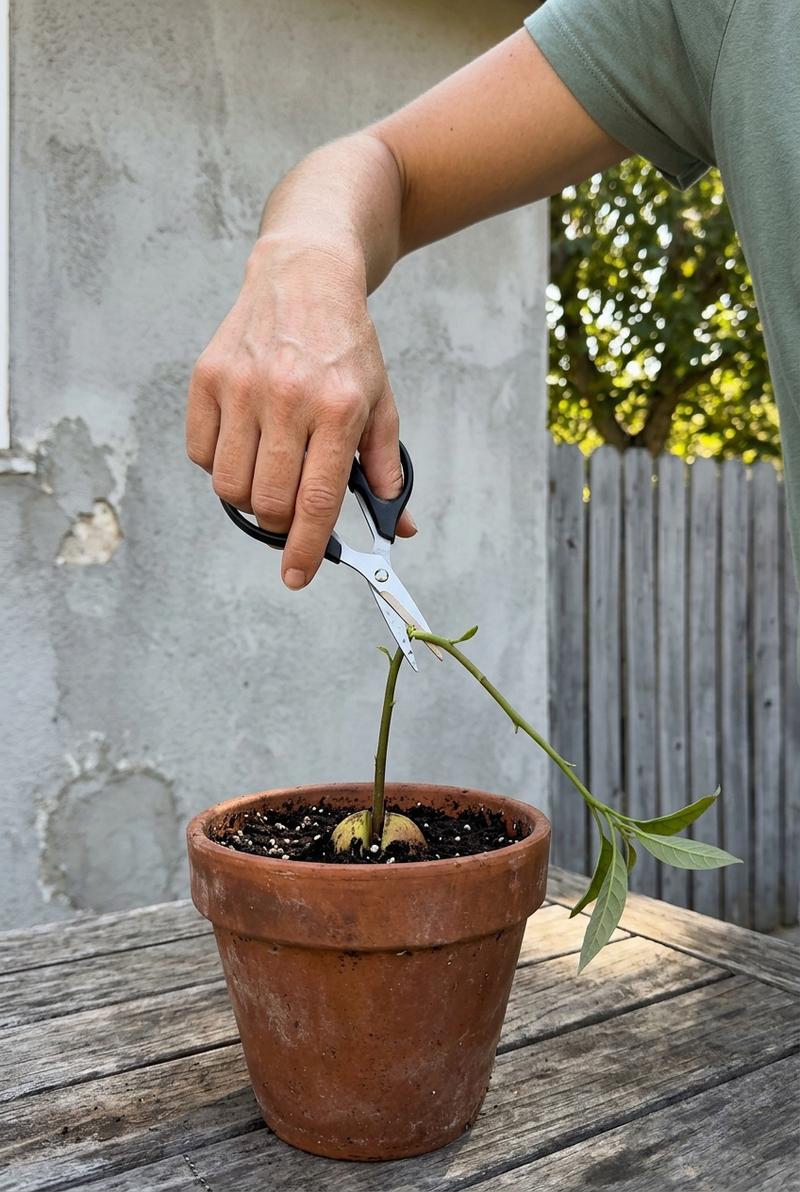
When your seedling hits 6 to 8 inches (15 to 20 cm), cut it back to 3 inches (7.5 cm).
Yes, half the plant. I know.
I stood there with the scissors the first time and physically could not do it. The plant had finally sprouted, it was alive, and the instructions wanted me to cut most of it off. I waited two months. The stem kept stretching. Eventually I had a 14-inch broomstick with two leaves at the top and zero side branches.
So the next pit, I cut it back at 7 inches. Two weeks later, three new side shoots came in from below the cut. That’s how you go from a stick to an actual tree shape.
Use clean scissors. Cut just above a leaf node, on a slight angle. The plant will pause for a couple of weeks, then push out the lateral branches that turn it into a real-looking houseplant.
Our three-year-old likes to “help” with these snips, which mostly means standing very close and saying “now?” until I’m done. Worth it.
Repeat this pruning each time the plant adds another 6 inches of new growth. Each cut triggers more branching. Within a year, you can shape a respectable little tree.
What This Tree Will Actually Do (An Honest Word About Fruit)
This is the part most tutorials soften. I’m going to say it straight.
Your pit-grown tree almost certainly will not produce avocados. Not in three years. Not in ten years. Probably not ever, if it lives indoors.
Did you know
Every commercial avocado you’ve eaten (Hass, Fuerte, Reed) comes from a grafted tree, not a seed-grown one. UC Cooperative Extension Ventura County confirms that seed-grown avocado trees “usually do not produce fruit true to the parent variety,” and many never fruit at all. A Hass pit will not grow a Hass tree.
Seed-grown avocados take 7 to 15 years to fruit even outdoors in ideal climates. Indoors, they lack the light intensity, the temperature swings, and the pollinators they’d need. The honest answer is: this is a beautiful tropical houseplant, full stop.
Knowing this upfront changed how I felt about mine. I stopped checking for buds. I started looking at the leaves, which are genuinely beautiful, glossy and a little tropical-looking in a way nothing else in my house is.
If you actually want avocados, buy a small grafted Hass or Wurtz from a nursery (Wurtz is the dwarf one, sometimes labeled “Little Cado”). That’s a different project with a different timeline. For container-grown trees that genuinely thrive in pots, this list of small trees has a few that actually fruit indoors with patience.
Years One Through Three: What to Expect
Here’s a rough timeline, based on mine and a few I’ve watched friends grow.
- Months 1 to 3. Germination and the first growth spurt. Stem reaches 8 to 12 inches (20 to 30 cm). First pruning happens around month two or three.
- Months 4 to 12. Side branches come in. Leaves get larger and more leathery. The plant starts to look less like a science experiment. Repot once at around month six, moving up just 1 to 2 inches in pot diameter.
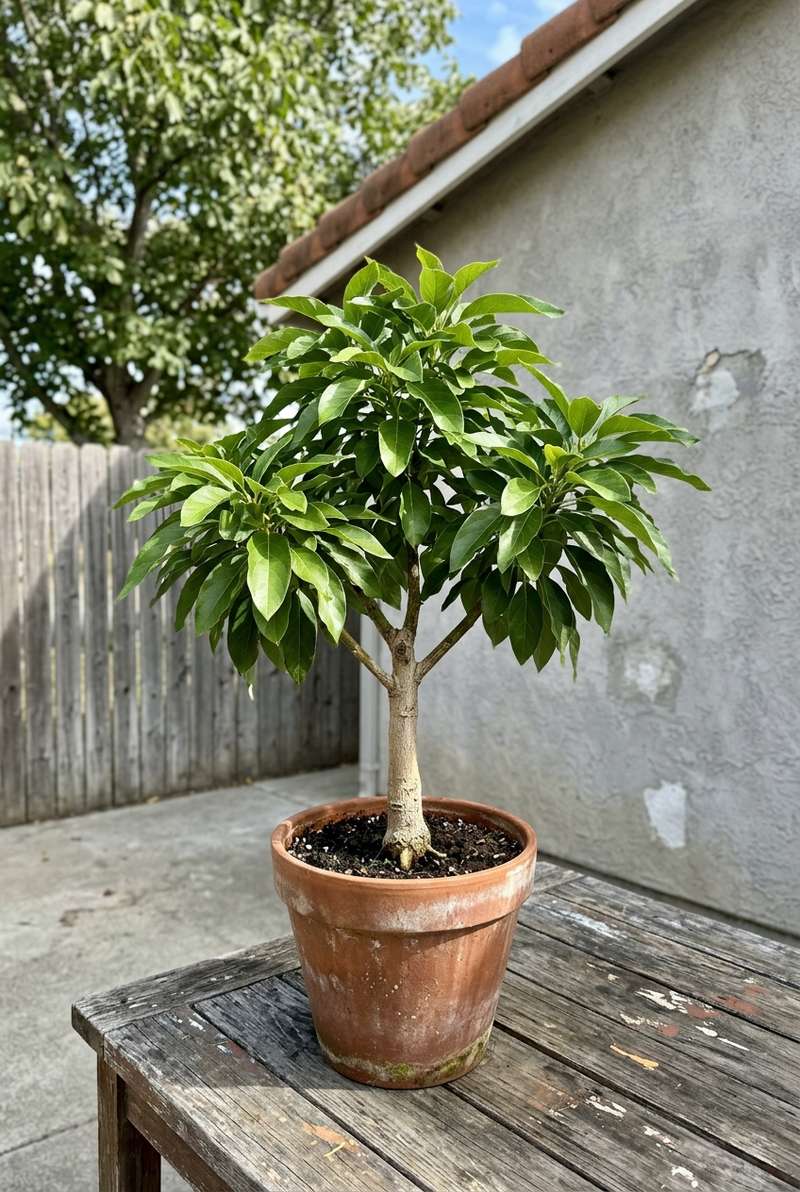
- Year two. The trunk thickens. Color shifts from pale green to a soft woody brown at the base. Second prune triggers more branching. By the end of year two, you have something that looks like a tree, not a sprout.
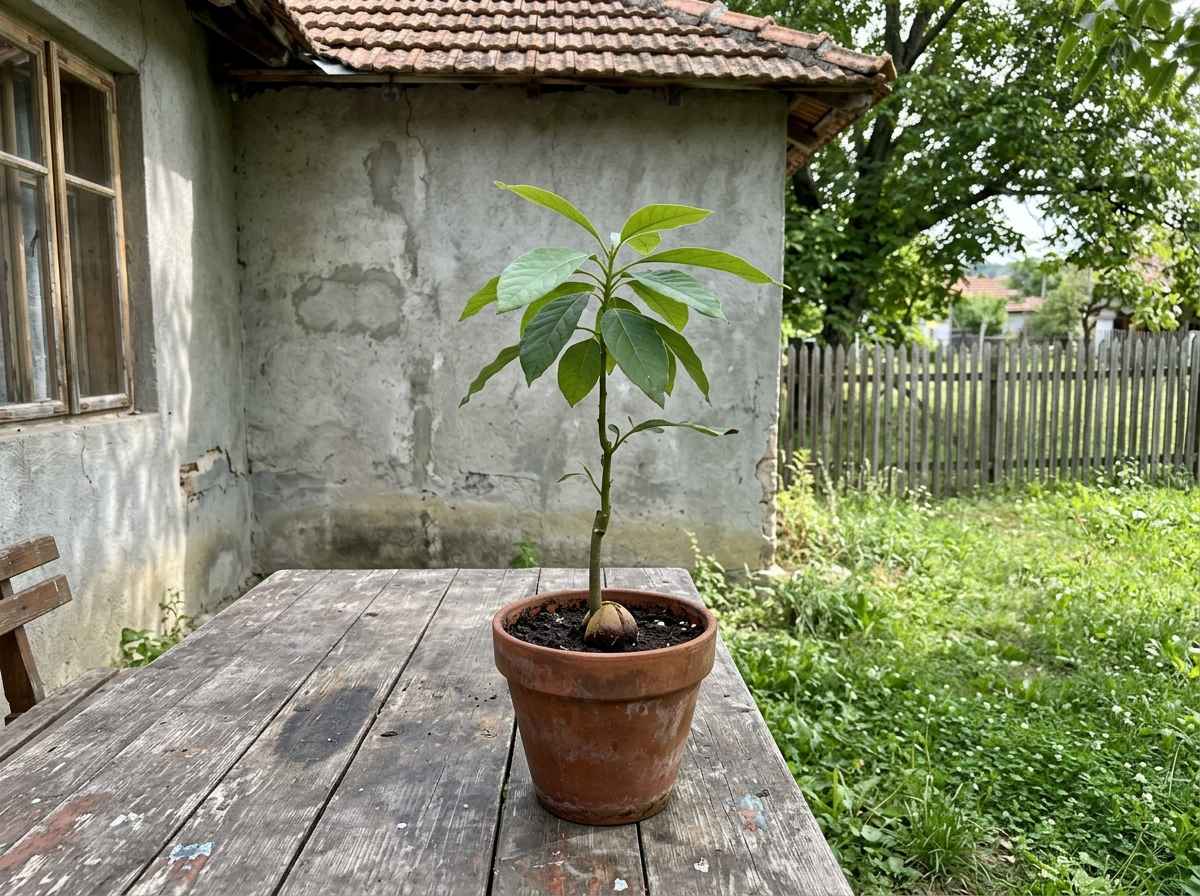
- Year three. Real tree shape, maybe 3 to 4 feet (90 to 120 cm) tall in a 10-inch pot. Glossy canopy of leaves. Move to a slightly bigger pot every spring. Use a balanced houseplant fertilizer at half strength once a month from spring through early fall.
Mine sat in a corner for the first year doing very little that felt impressive. By the end of year two, it had become my favorite plant in the house. Not because it’s flashy, but because I remembered eating that avocado, on a Tuesday, in a sandwich, and now there’s a tree.
That’s the whole point of growing an avocado from a pit. It’s not the fruit. It’s the small, slow proof that something you’d otherwise throw away can become a living thing in your kitchen. Worth every cloudy glass and rotted first attempt.