How to Build a Compost Bin From Pallets (Under $20, No Power Tools)
- Beginner-friendly
- Under $20
- No power tools
- One afternoon
I built two compost bins wrong before this one.
The first had no lid, so a wet January turned it into a swamp. The second had a sealed front that made turning the pile physically impossible.
Third try worked. Four pallets, some wire, one design choice most tutorials skip.
Here’s the build I’d hand to anyone starting from scratch, plus the honest stuff nobody puts on the Pinterest pin.
Quick Pick: Which Bin Actually Fits Your Yard
- Pallet bin (this build): cheapest, biggest, lasts 2-3 years. Best all-rounder.
- Wire cylinder: fastest to build. Loses moisture fast. Fine for leaves.
- Plastic drum or tumbler: rodent-resistant. Small capacity. Hard to get the ratio right in a sealed drum.
- Dual-bay wooden: the “forever” version. Costs 3-4x more and needs actual carpentry.
- Start with the pallet bin. If you outgrow it in year two, you already know exactly what you want next.
Four Builds, Ranked by How Much You’ll Actually Use Them
Most articles walk you through one bin like it’s the only option.
The truth is the “best” build depends on five things: how much space you have, how much you want to spend, whether rats are in your neighborhood, how cold your winters get, and how many years you actually want this thing to last.
Here’s the honest ranking after killing two of my own:
- Pallet bin: three-sided box from four pallets. About $10-$18 in wire and hardware cloth. Big enough (3 ft cubed / 90 cm cubed) to actually heat up. Lasts two to three seasons before the softwood pallets start crumbling.
- Wire cylinder: a ring of hardware cloth, staked. Ten minutes to build. Dries out fast, so it’s fine for leaves but slow for kitchen scraps.
- Tumbler: the one that shows up in every ad. I’d skip it. Capacity is tiny (usually 30-50 gallons / 115-190 L), and it’s hard to keep the ratio right in a sealed drum.
- Dual-bay wooden: one active pile, one curing. Beautiful. Also two long weekends of building and $80+ in lumber. Worth it after your first year, not before.
The pallet bin is the one I’d start with. Cheap enough that a mistake doesn’t sting, big enough to actually work, and by the time it rots, you’ll know if you want to level up.
Read the Pallet Stamp Before You Load the Truck
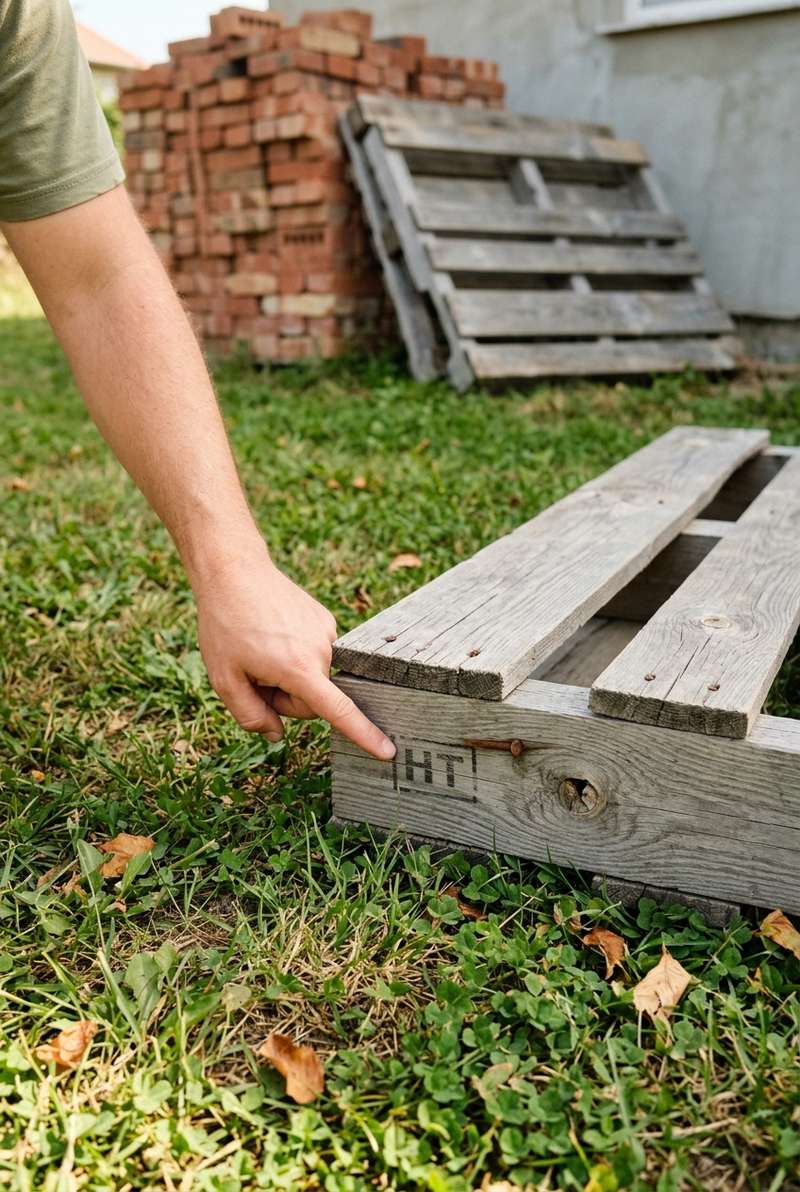
Most free pallets are fine. Some aren’t. The difference is stamped right on the wood.
Look for two letters on the side of the pallet:
- HT = heat-treated. Safe. Grab it.
- MB = methyl bromide fumigation. Skip it. That chemical does not belong within twenty feet of your compost.
- No stamp = local pallet, usually fine, but you don’t know its history. My rule: pass unless it’s clearly clean and dry.
Common mistake
Painted, stained, or oily-looking pallets are a hard no. If it smells like chemicals, it is chemicals. Walk away and grab the next one.
Oak pallets rot slower than pine or spruce, but honestly, most free pallets you find are softwood. Plan for a two-to-three year lifespan and you won’t be disappointed.
Where to get them: hardware stores, garden centers, small warehouses, feed stores. Ask at the loading dock. Half the time they’ll pay you to take them.
The $18 Materials List (No Power Tools Needed)
The whole build costs me roughly $15-$20 total, and that’s if I’m buying the wire new. If you already have a spool of anything strong lying around, it’s basically free.
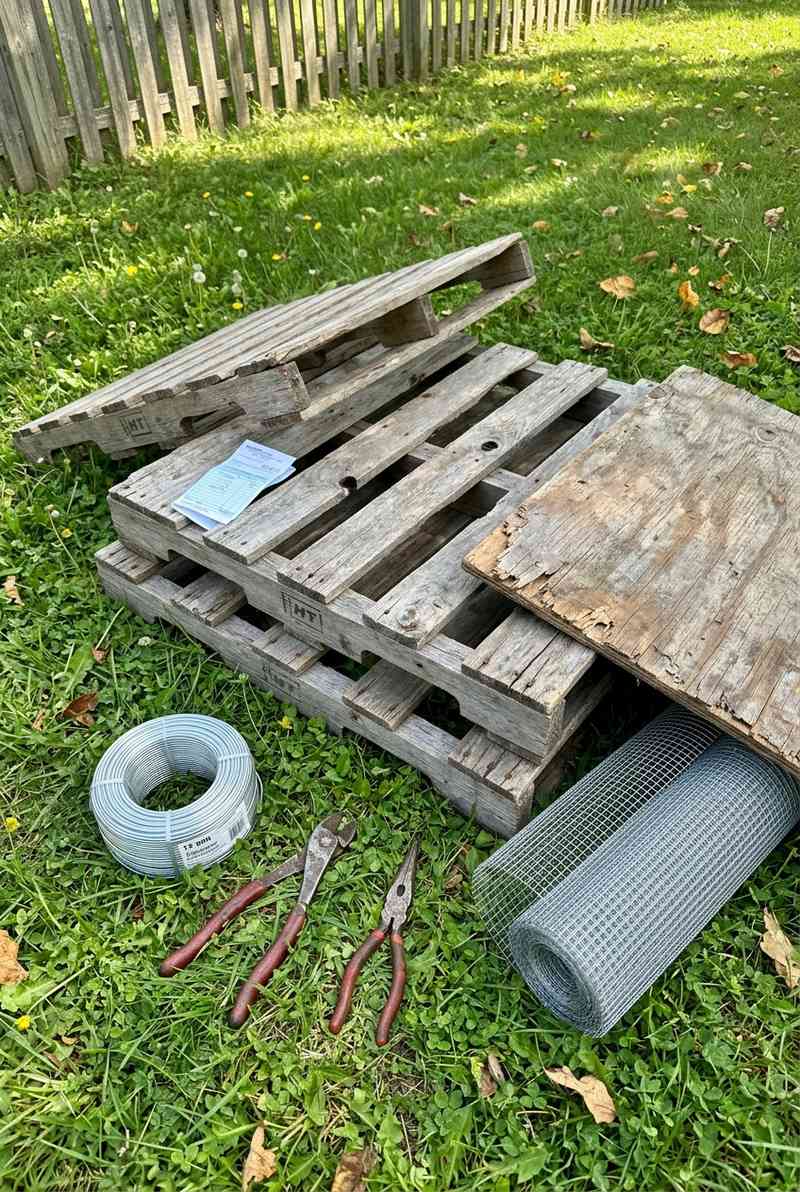
What You’ll Need
- 4 HT-stamped pallets, same height (36-42 inches / 90-107 cm ideal)
- Roll of 14-gauge galvanized wire, or a bag of heavy-duty zip ties (12-inch / 30 cm)
- 1/4-inch (6 mm) hardware cloth, about 3 ft x 3 ft (90 cm x 90 cm), not chicken wire
- Piece of scrap plywood, cardboard, or a tarp for the lid (18 sq ft / 1.7 sq m)
- Two bricks or short stakes to elevate the base
- Wire cutters, pliers, work gloves
Time: 45-90 minutes · Difficulty: Easy
One note on the hardware cloth: 1/4-inch mesh is what actually keeps mice out. Chicken wire has holes wide enough for a mouse to walk through sideways. I learned that one the hard way.
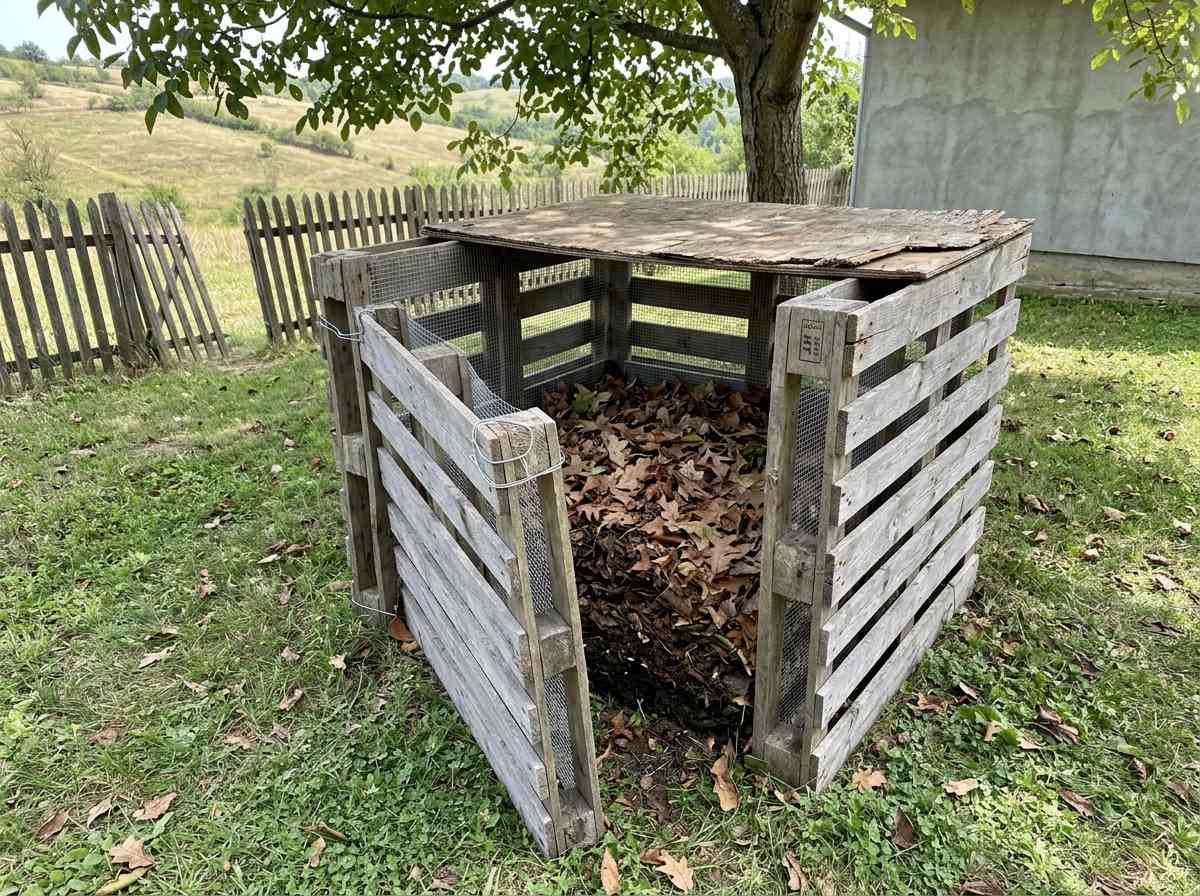
Build It in an Afternoon
No sawing, no drilling, no measuring beyond eyeballing corners. If you can tie a shoelace, you can wire four pallets together.
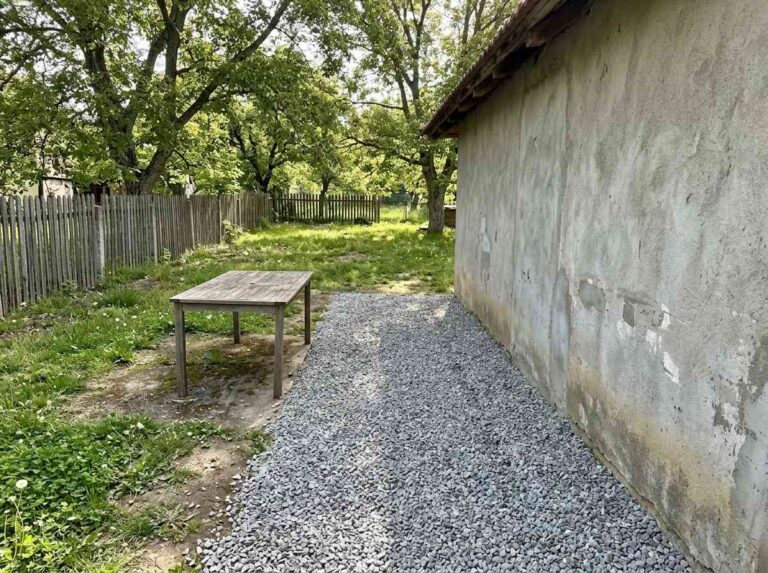
Pick the spot before you carry anything
Level ground, partial sun (full sun dries the pile out, deep shade slows it down), on bare soil if possible so worms and microbes can move in from below.
Keep it within hose reach. You’ll thank yourself in August when the pile needs water and the hose won’t stretch.
Stand the three sides first
Set one pallet flat on the ground as the floor (optional but keeps the pile off the mud), then stand three pallets up around it like a three-sided box. Back panel first, then the two sides. Leave the front open for now.
Prop them up with the bricks or a helper’s knee. This is the moment you’ll wish you had a second person.
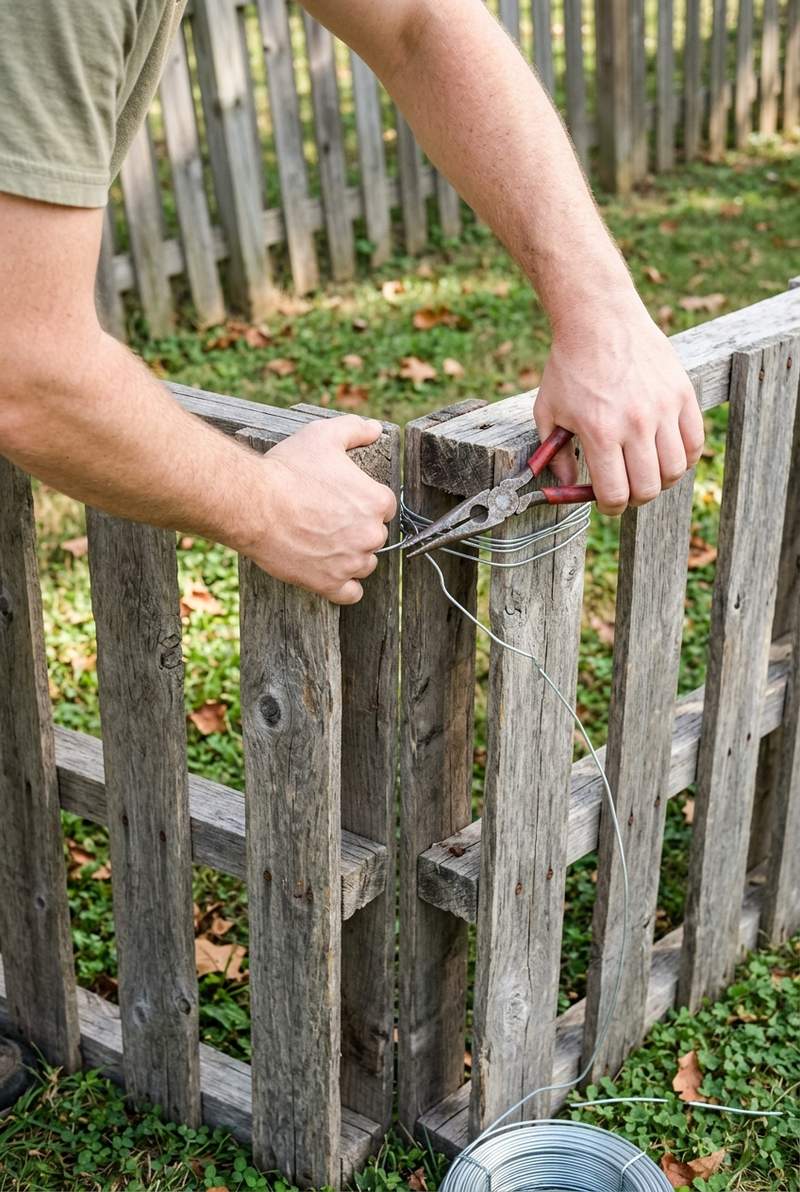
Wire the corners tight
Wrap the 14-gauge wire around each corner in a figure-eight, three or four passes, then twist the ends together with pliers. Do this at the top, middle, and bottom of every corner.
Zip ties work if you don’t have wire, but plan on replacing them every year. Sun eats them.
Line the inside with hardware cloth
Cut the hardware cloth to fit the inside of the box, then staple or wire it to the pallet slats. Focus on the bottom edges and the lower half of each side.
This does two jobs: keeps finished compost from falling out through the slat gaps (a real problem competitors never mention), and stops mice from strolling in for a snack.
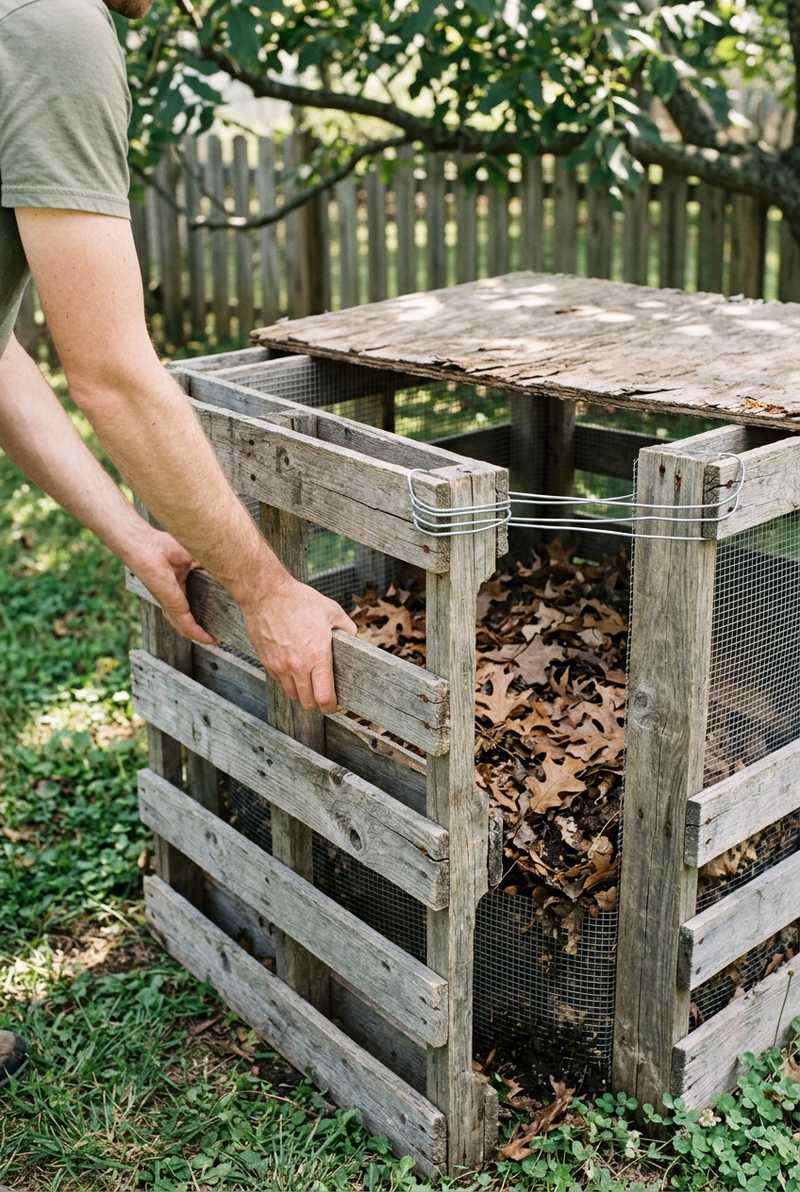
Leave the front loose, on purpose
Don’t wire the fourth pallet on. Just lean it against the front, or wire it at the top corners only so it swings open like a barn door.
You want easy access. More on why in the next section.
Add the lid
Plywood, an old shower curtain over cardboard, a tarp weighted with bricks. Whatever you have. The lid keeps rain out (huge) and heat in.
Not fancy. Just something that sheds water.
Save this to PinterestThe Front Panel Trick Nobody Mentions
Here’s the design choice that separates a bin you’ll use from a bin you’ll ignore.
Wire all four sides together and you’ve built a box you can’t turn the pile inside. Turning wet, half-broken-down material inside a 3-ft cube (90 cm) is a workout with a pitchfork and a shovel.
Leave the front loose (or hinge it) and turning takes ten minutes instead of thirty.
My preferred version: hinge the top of the front pallet with two loops of wire and let the bottom swing free. Lift it up, pin it back with a stick, work the pile, drop it down when you’re done. That’s it.
Tip
If you’d rather use horizontal boards across the front instead of a pallet, slot them into a pair of L-brackets or corner pockets so you can pull out one board at a time as the pile grows. This is the version I’d build if I did it over.
The Only Ratio You Need (Two Handfuls Browns, One Handful Greens)
Every composting article turns this into a chemistry lesson. It doesn’t have to be.
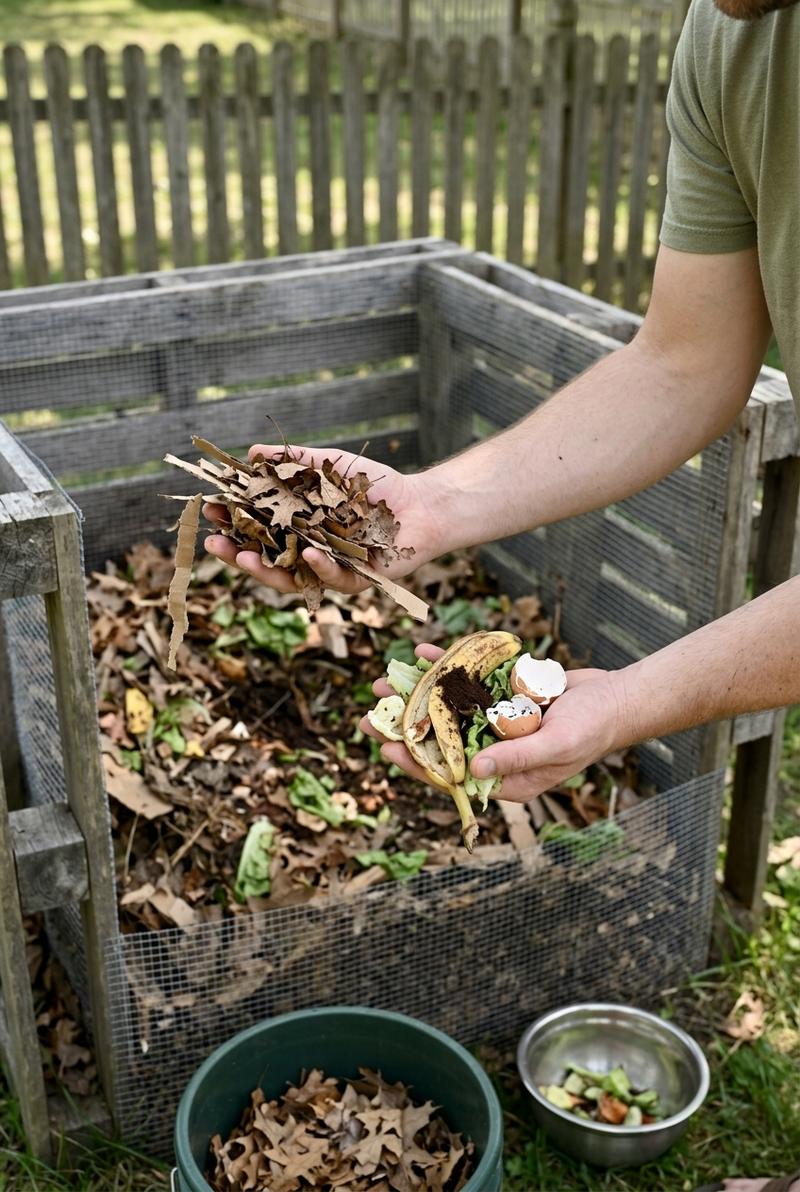
The ratio: two parts browns to one part greens, by volume, not weight. That’s what the EPA and most extension offices actually recommend, even though the internet loves to say 50/50.
- Browns (carbon): dry leaves, straw, cardboard torn into strips, shredded newspaper, small twigs, sawdust from untreated wood.
- Greens (nitrogen): fruit and veg scraps, coffee grounds (yes, even though they look brown), fresh grass clippings, weeds that haven’t gone to seed, tea bags.
Every time you add a bucket of kitchen scraps, throw in two buckets of dry leaves or shredded cardboard on top. That’s the whole rule.
Moisture should feel like a wrung-out sponge. Squeeze a handful. If water drips, it’s too wet. Add browns. If it crumbles like dust, spray it with the hose.
Did you know
You don’t need to add worms to an outdoor compost bin. If the pile heats up properly (above 130°F / 54°C), it’ll kill any worms you throw in. Worms colonize on their own once the pile cools, or they belong in a separate vermicomposting setup entirely.
What to keep out: meat, fish, bones, dairy, greasy leftovers, dog and cat waste, pressure-treated wood, glossy paper. All of it either attracts pests or introduces things the pile can’t safely break down.
How to Tell It’s Cooking (And When It’s Actually Done)
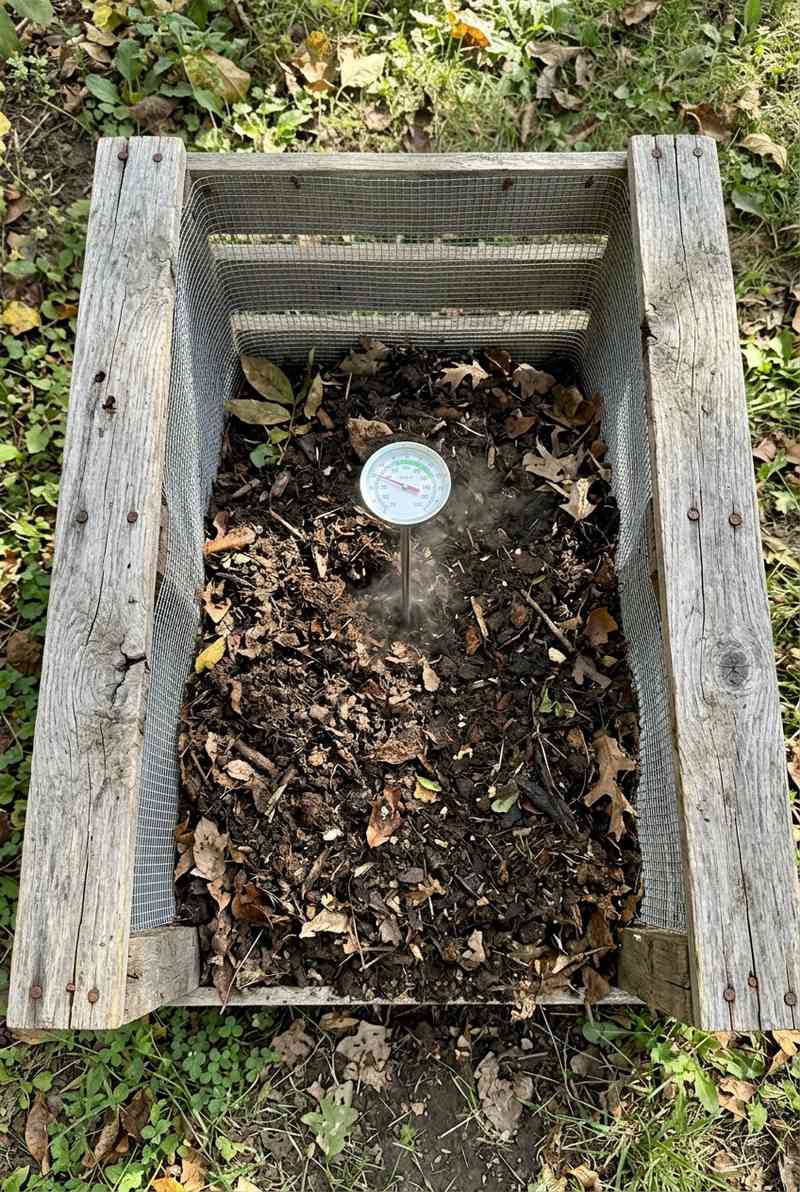
A working pile is warm. Sometimes hot enough to steam on cold mornings.
The sweet spot is 90-140°F (32-60°C) in the middle of the pile. You can check with a compost thermometer or just push your hand into the center. If it feels bathwater-warm, you’re in business.
Turn the pile when it starts to cool below 90°F (32°C), or roughly once a week for the first month. Turning brings the outer material to the middle and adds oxygen, which is what the microbes actually need. See Cornell’s composting temperature factsheet if you want the deep science.
Common mistake
Above 160°F (71°C), the pile kills the beneficial microbes AND becomes a spontaneous combustion risk. If yours ever gets that hot, turn it immediately and add browns. Hotter is not better.
When is it actually done? Most articles say “when it looks like dark, crumbly soil.” True, but slippery.
The real signal: the pile drops below 70°F (21°C) and stays there, even after you turn it. That means the microbes have run out of food and the process is finished. Timeline is usually 3-5 months if you turn it weekly, up to a year if you set it and forget it.
Finished compost smells like a forest floor. Not sour, not funky, just earthy. If your pile smells rotten, that’s the pile telling you it’s too wet or too green. Fix with browns and a turn.
Five Things I Did Wrong the First Year
None of these are hypothetical.
- No lid. A December of rain turned my first bin into a black anaerobic soup that smelled like a broken sewer. A tarp with a brick on top would have saved the whole pile.
- Chicken wire instead of hardware cloth. Mice walked in. I watched one do it in daylight. Rebuild with 1/4-inch mesh (6 mm) and the problem stopped that week.
- Bin too small. My second attempt was a 2-ft cube (60 cm). Never got warm. A pile needs at least 3 ft cubed (about 27 cubic feet / 0.75 cubic meters) to hold enough thermal mass to heat up.
- Sealed front. I wired all four sides tight, then realized I couldn’t turn the pile without dismantling the box. Removed one side, rebuilt as a barn door, done.
- One bin. By month four, I was still adding fresh scraps to the pile I was supposed to be curing. If you have space, a second bay is worth building later. That’s why my next upgrade looks a lot like a pallet raised bed. Just a second box next to the first.
My toddler thinks the compost bin is a personal treasure box, by the way. Half the eggshells go in wrong. I’ve stopped fighting it.
If you want the longer list of things I got wrong that first season, I wrote about them in everything we got wrong our first year in the garden.
When the Pallets Finally Rot Out
Softwood pallets sitting on damp ground will give you two, maybe three seasons. Then a corner sags, a slat cracks, and one afternoon a whole side leans over.
That’s the point. You built a $20 box out of free wood. It was always going to compost itself eventually.
Three options when that happens:
- Swap in fresh pallets. Ten minutes. Free wood, same design, another two years.
- Upgrade to a dual-bay wooden bin using 2×6 (5×15 cm) lumber and removable front boards. Costs $80-$120 in materials and lasts a decade.
- Add a curing bay next to the original. Active pile on one side, finished compost curing on the other. This is the setup I’d have skipped straight to if I had it to do again.
Whichever way you go, save some of the finished compost from the old bin. Sprinkle a few shovelfuls into the new one to inoculate it with the microbes you spent two years building. See the EPA’s home composting guide for the timing on what to expect from a fresh pile.
The other place that finished compost belongs is on top of your raised beds in the fall. If you already have beds, the routine I use is in how I recharge raised bed soil.
The First Batch Doesn’t Have to Be Pretty
Your first bin will lean a little. The wire will look janky. You’ll add too many greens the first month and it’ll get soggy.
All of that is fine. Compost happens whether the box is square or not. Build the thing, feed it, cover it, turn it now and then. In six months you’ll be shoveling black gold onto your beds and wondering why you didn’t do it years ago.