How to Propagate Roses From Cuttings (Without Killing Them)

- Rose lovers
- Beginner gardeners
- Anyone saving grandma’s rose
My grandmother had one rose bush by her kitchen door.
Deep red, gone leggy at the base, with a fragrance that hit you before you reached the step.
I’ve been trying to keep a piece of it alive since she passed.
Propagating roses isn’t the impossible art everyone makes it sound like. It’s mostly timing, humidity, and knowing which roses actually root.
Here’s what I learned after three seasons of cuttings, plenty of dead ones, and the batch that finally worked.
The Short Version
- Take semi-hardwood cuttings in mid to late summer, right after the first bloom flush
- Cut a pencil-thick stem, 6 to 8 inches (15 to 20 cm) long, with 4 to 5 leaf nodes
- Skip the potato trick. Use real IBA rooting hormone if you can
- A humidity dome isn’t optional. Roots take 4 to 8 weeks
- Old garden roses root easily. Modern hybrid teas usually don’t. Start with the right rose.
What You’ll Need
- Sharp bypass pruners or a clean utility knife
- Small terracotta pots (4 to 6 inches / 10 to 15 cm)
- Perlite and vermiculite, 1:1 ratio (or perlite plus coarse sand)
- IBA rooting hormone powder (500 to 5,000 ppm)
- Clear plastic bag, 2-liter bottle, or clear storage tote for a humidity dome
- Rubbing alcohol for tool sterilization
Time: About 30 minutes to prep cuttings, then 6+ weeks of waiting · Difficulty: Medium
Not Every Rose Wants to Be Copied
Before I picked up my pruners, I had to accept two things nobody warns you about when you Google this.
The first one is legal.
Most modern roses are patented under the US Plant Patent Act. Knock Out roses, most David Austin varieties, most hybrid teas from the last twenty years.
If the plant tag says “PP” followed by a number, you don’t legally hold the right to propagate that plant. Patents last twenty years, so anything registered before roughly 2005 is fair game.
Enforcement targets nurseries, not people rooting one cutting in a plastic pot. But it’s worth knowing before you fall in love with a variety you can’t legally copy. The Piedmont Master Gardeners have a good breakdown of what’s covered.
Common mistake
Assuming a rose is fair game just because you own the parent plant. Ownership of the plant and the right to propagate it are two different things under patent law.
The second thing is biological, and it broke my brain when I first learned it.
Most modern hybrid teas were bred with weak root systems on purpose. Commercial growers graft them onto vigorous rootstock like Dr. Huey or Rosa canina because their own roots can’t hold the plant up.
That’s why cuttings of a store-bought hybrid tea usually fail. The plant literally doesn’t want to grow on its own roots.
Did you know
Old garden roses, gallicas, damasks, and albas were never bred that way. They root from cuttings easily because they always have. Fraser Valley Rose Farm has a great writeup on why own-root roses came back into fashion.
Not sure what type your rose is? Look at the base.
A visible graft union (a knobby swelling a few inches above the soil) means it’s grafted. Cuttings will grow into a different plant than the parent above the graft.
No graft union usually means own-root, and cuttings will grow true.
Pick an old garden rose, a shrub rose, or a rambler for your first attempt. The success rate difference isn’t subtle.
The Pencil-Thick Rule
The timing window is narrower than most articles admit.
You want semi-hardwood cuttings, taken in mid to late summer after the first bloom flush has finished and before the wood hardens off for fall.
Weather signals over the calendar: wait until this year’s growth has firmed up but still has some green pliability. In the northern hemisphere, that’s usually the week you first notice the mornings feeling cooler.
Softwood cuttings (taken in late spring) work too, but they’re touchier and rot faster. Hardwood cuttings (late fall) work for very tough species roses, but success rates drop hard for anything hybrid.
Semi-hardwood is the sweet spot for home gardeners.
The stem itself is where most people go wrong.
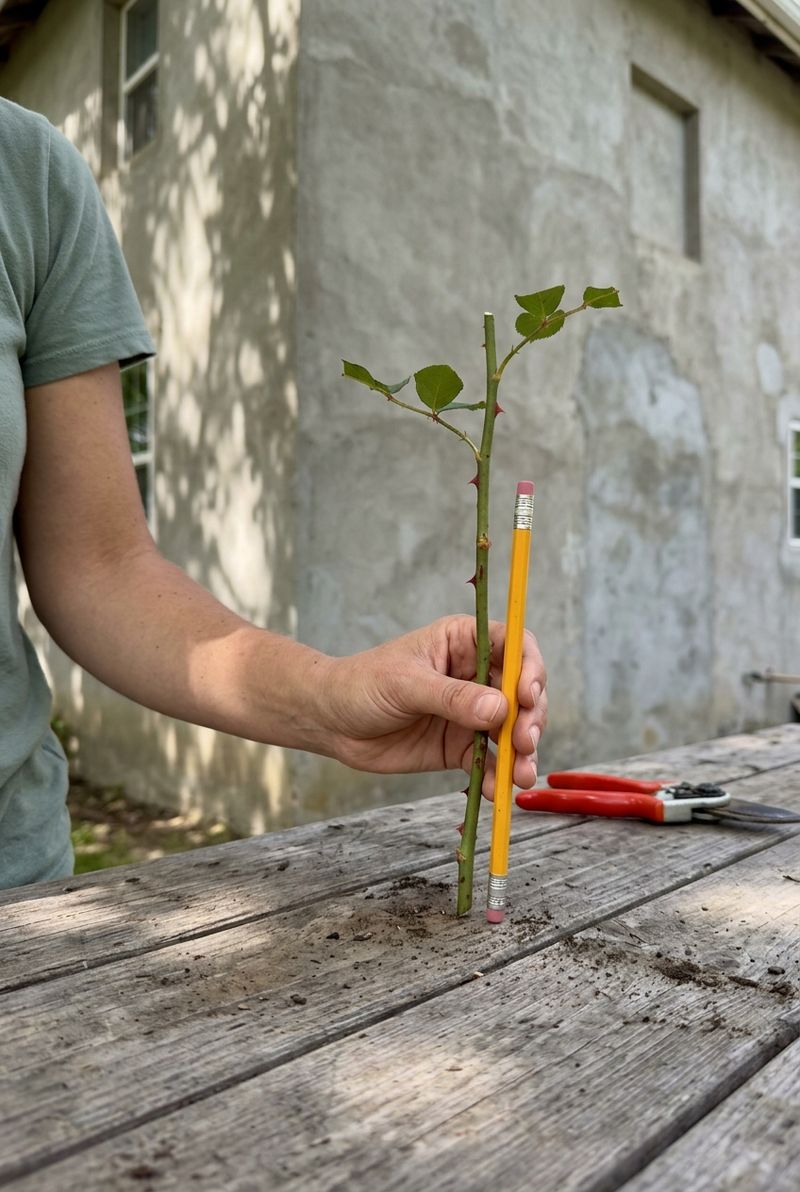
You want pencil-thick. Not skinny. Not woody.
About the diameter of a standard yellow pencil, or roughly a quarter inch (6 mm). Softer than that and it’ll rot. Woodier and it won’t root.
Tip
Snap-test it. Bend the stem gently. If it flexes and creaks slightly before wanting to break, it’s ready. If it snaps clean like a green bean, it’s too soft. If it barely bends at all, it’s too old.
Look for a stem that has just finished blooming, or one that never bloomed at all this season.
Aim for a stem with at least four leaf nodes. That’s the little bump where a leaf attaches. You’ll need those nodes for both the cut and the eventual roots.
Two Cuts That Matter More Than You Think
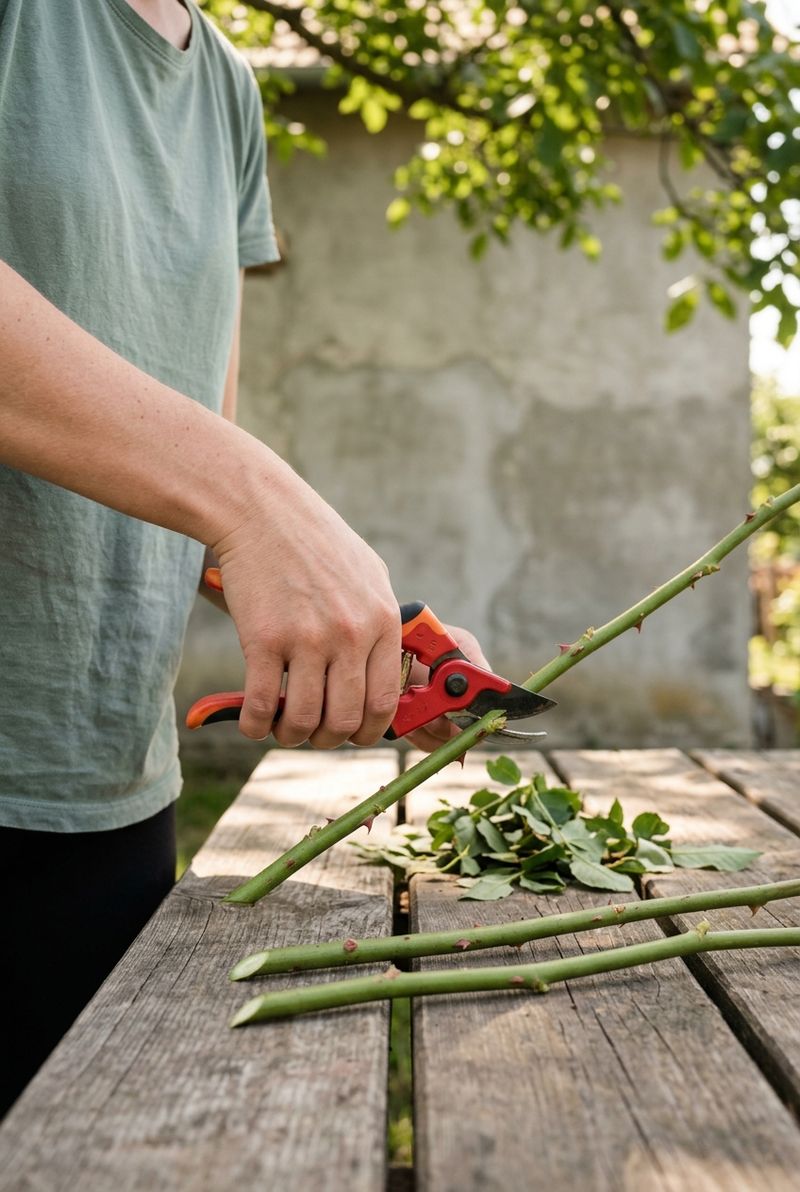
Every rose cutting starts with two cuts.
The bottom cut is where roots will form.
Make it at a slight angle, roughly 45 degrees, and place it just below a leaf node. Roots emerge from the vascular tissue right at that node, so keeping the cut about a quarter inch below the node matters more than the exact angle.
The angle mostly gives more surface area for roots and helps you tell which end is up.
The top cut is flat and horizontal, made about a quarter inch above a leaf node. This slows water loss and reads at a glance so you don’t plant it upside down (I’ve done that, and it’s the kind of mistake you only make once).
Strip off all the leaves from the bottom two-thirds of the cutting.
Leave two or three leaves at the top. Cut those remaining leaves in half.
Sounds harsh. It reduces transpiration while keeping enough photosynthesis to fuel root growth. This is the step most beginner guides skip and it isn’t optional.
Wipe your pruners with rubbing alcohol between plants. Rose mosaic virus and blackspot both hitch rides on dirty blades.
Why Willow Water Is Only Half the Answer
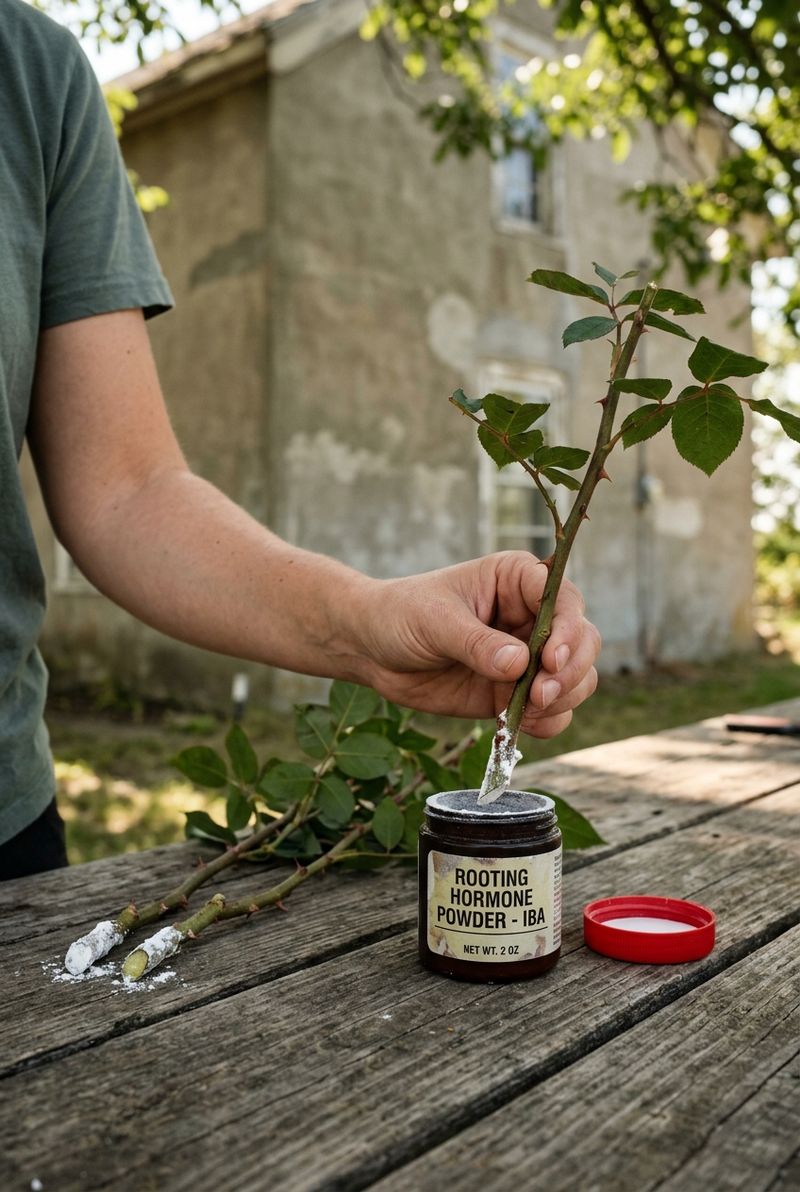
This is the section where I annoy about half the internet.
Willow water works. There’s real chemistry behind it.
Willow bark contains natural IBA (indolebutyric acid), which is the same compound commercial rooting hormones are built on. Trials by rose rustlers going back to the 1980s have shown it does improve root initiation over plain water.
But.
The IBA solubility ceiling in water sits around 250 parts per million. Semi-hardwood rose cuttings root best at 1,000 to 5,000 ppm.
Willow water can give a soft boost. It can’t do what a proper hormone product can.
Honey is worse. It has no rooting hormone in it, just antimicrobial properties, which is a completely different job. Cinnamon is the same. Neither is actively harmful. Neither is giving your cutting what it actually needs.
| Method | Actual IBA | Verdict |
|---|---|---|
| Commercial IBA powder | 1,000–5,000 ppm | Best for semi-hardwood |
| Willow water | ~250 ppm max | Real, but weak |
| Honey | Zero | Antimicrobial only |
| Cinnamon | Zero | Antimicrobial only |
Here’s my honest opinion. Use a commercial IBA rooting hormone.
The powdered kind is cheap, lasts years on a shelf, and outperforms every kitchen alternative. This is the method I’d go with.
If you can’t get hormone, willow water is a fine backup. Skip the rest.
The Potato Trick I Wish Would Just Die
Every summer this one comes back around Pinterest.
You’ve seen it. The photo of a rose cutting stuck into a potato, buried in soil, meant to “provide moisture and nutrients while the cutting roots.”
It looks charming. It also doesn’t work.
A 2019 study tested rose cuttings in potatoes against standard propagation methods. The potato-rooted cuttings failed at a dramatically higher rate.
Michael Marriott, longtime head rosarian at David Austin Roses, has publicly called it a rot machine. Every extension office that has weighed in agrees.
The reason is simple.
Potatoes decompose. Rose cuttings inside decomposing potatoes rot before roots form. The potato also competes with the cutting for moisture rather than donating anything useful.
Skip the potato. It isn’t saving you a step. It’s just going to leave you with a mushy potato and a dead stick.
If you’ve had it work once, I promise you’d have had better odds with a plain pot of perlite.
Save this to PinterestHumidity Is the Whole Game
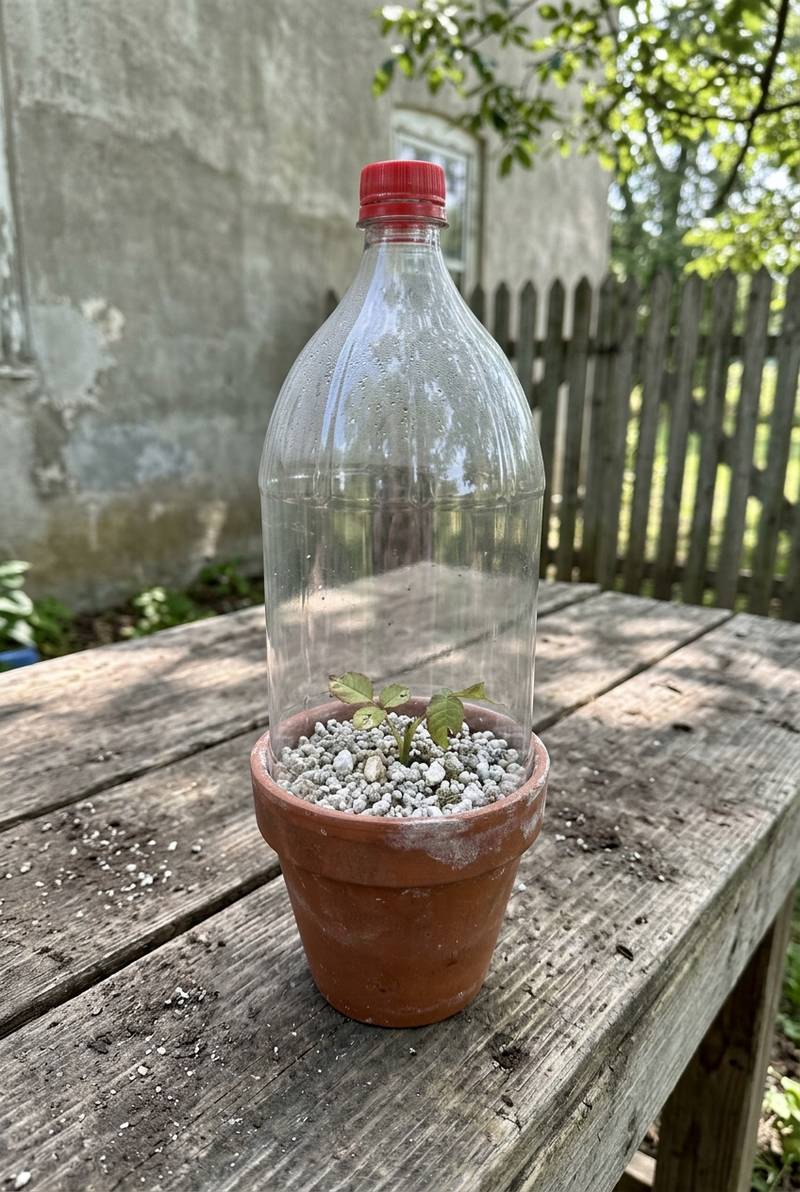
If I had to name the single thing that separates a rooted cutting from a shriveled one, it’s humidity.
Rose cuttings lose water through their remaining leaves faster than they can pull it up from a rootless stem.
Without a humidity dome, most cuttings desiccate within a week.
The setup is stupidly simple.
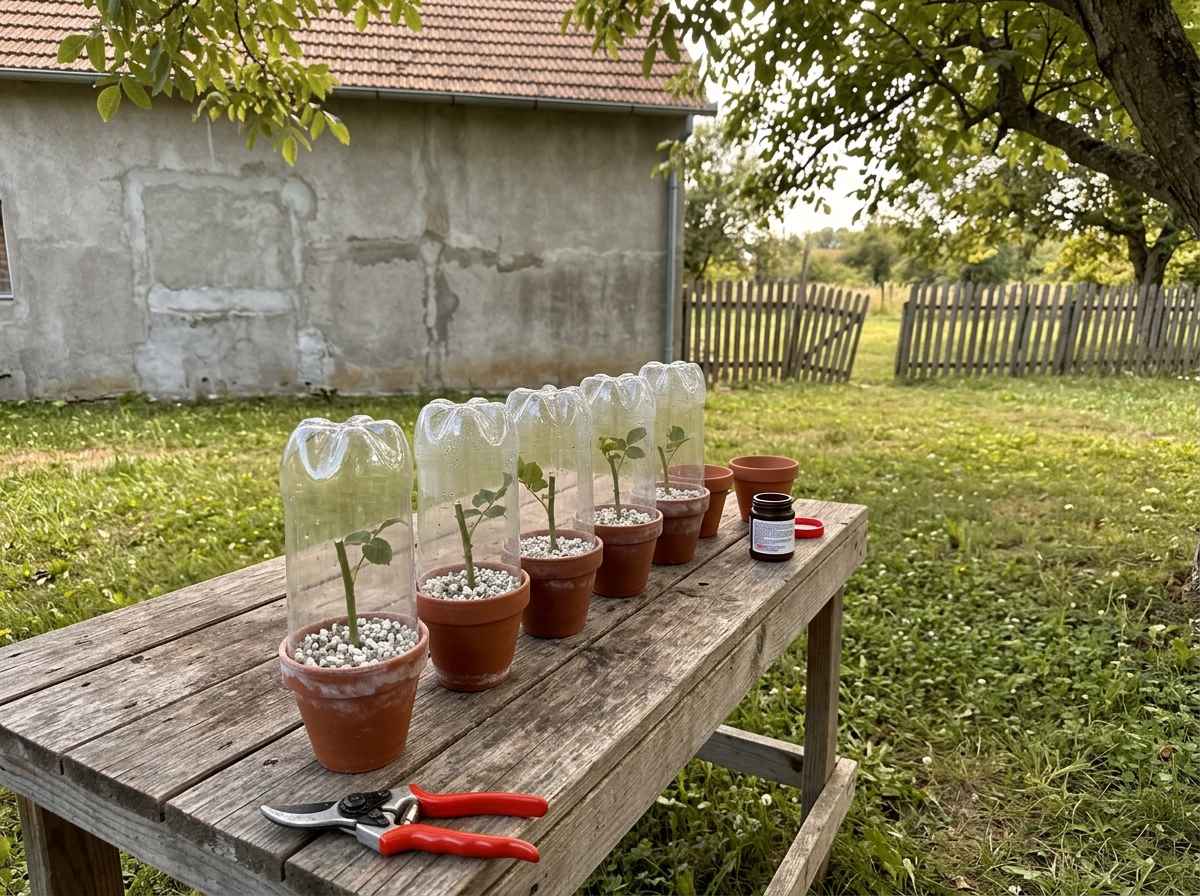
Push the prepared cutting into a small pot of moistened perlite-and-vermiculite mix (1:1 ratio). Terracotta pots beat plastic here because they breathe and prevent waterlogging.
I killed my first batch by using plastic pots and keeping the medium too wet. Learn from that.
Then cover it.
A clear plastic bag over the pot with three or four small stakes to hold it off the leaves works fine. A 2-liter soda bottle with the bottom cut off works better. A clear plastic storage tote with a loose lid works best if you’re rooting a batch.
Keep the dome out of direct sun. Bright indirect light is what you want.
Direct sun turns your dome into an oven and cooks the cutting inside.
Common mistake
Overwatering the medium. It only needs to be lightly moist, like a wrung-out sponge. Waterlogged perlite kills cuttings faster than dry perlite does.
Vent the dome briefly every three or four days to swap out stale air and check for mold. If you see white fuzz, wipe it off, air out the dome for an hour, and cut back on moisture.
Six Weeks of Doing Nothing
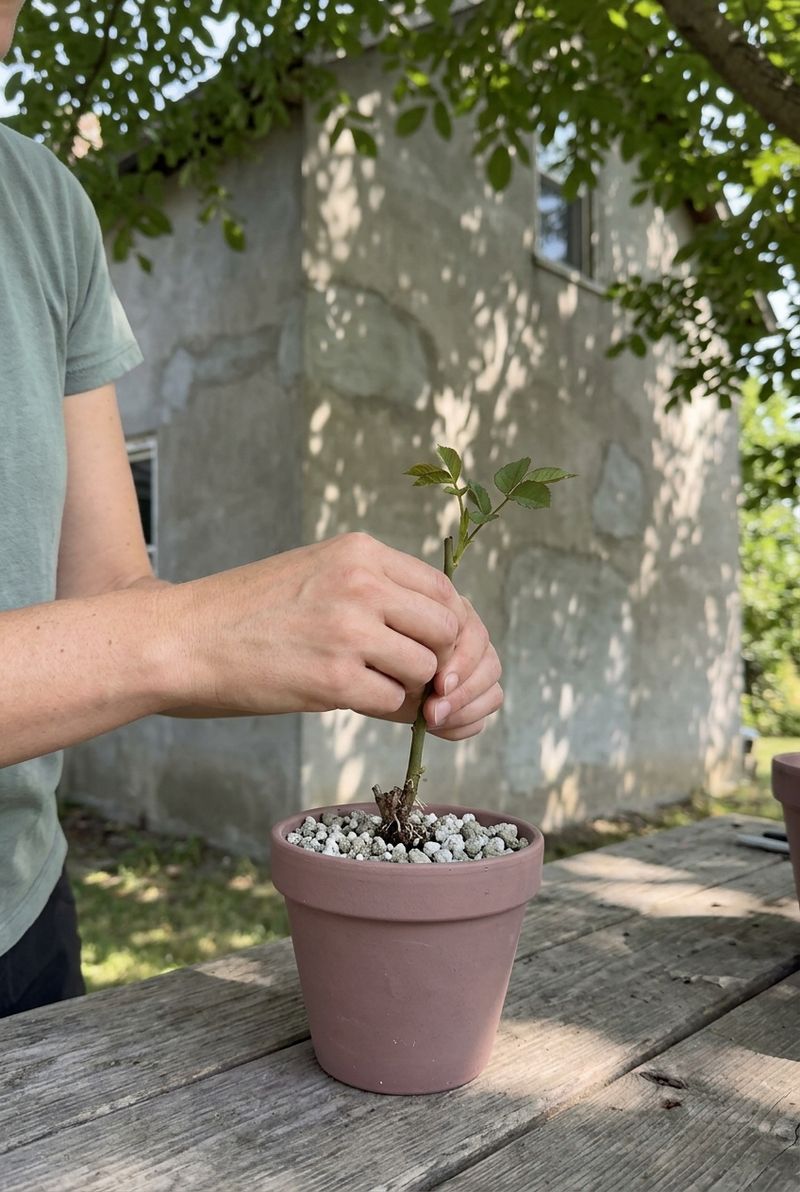
This is where most people ruin it.
Roots on a rose cutting take anywhere from four to eight weeks to form. There’s absolutely nothing to see during that time.
The cutting just sits there. Sometimes it drops a leaf. Sometimes it puts out a tiny new leaf, which is exciting but doesn’t actually confirm anything (top growth can happen before rooting, powered by stored stem energy).
Do not pull the cutting to check. Every time you tug it, you snap whatever hair roots have started.
There’s a common piece of advice online that says to wait for a callus to form before roots appear. Ignore this.
Roots emerge directly from the vascular cambium at the base of the stem. Callus tissue is a wound-healing response, not a root precursor.
Some cuttings callus first. Some root without any callus at all. Waiting for visible callus is a great way to let the cutting sit too long and give up on it.
The reliable test is the gentle tug at about the six-week mark.
If it lifts easily, roots aren’t there yet. Put it back and wait another two weeks.
If it resists, congratulations, you have a rooted rose.
Some batches root at four weeks. Some take three months. This is why you take extras.
When to Move Them, When to Wait
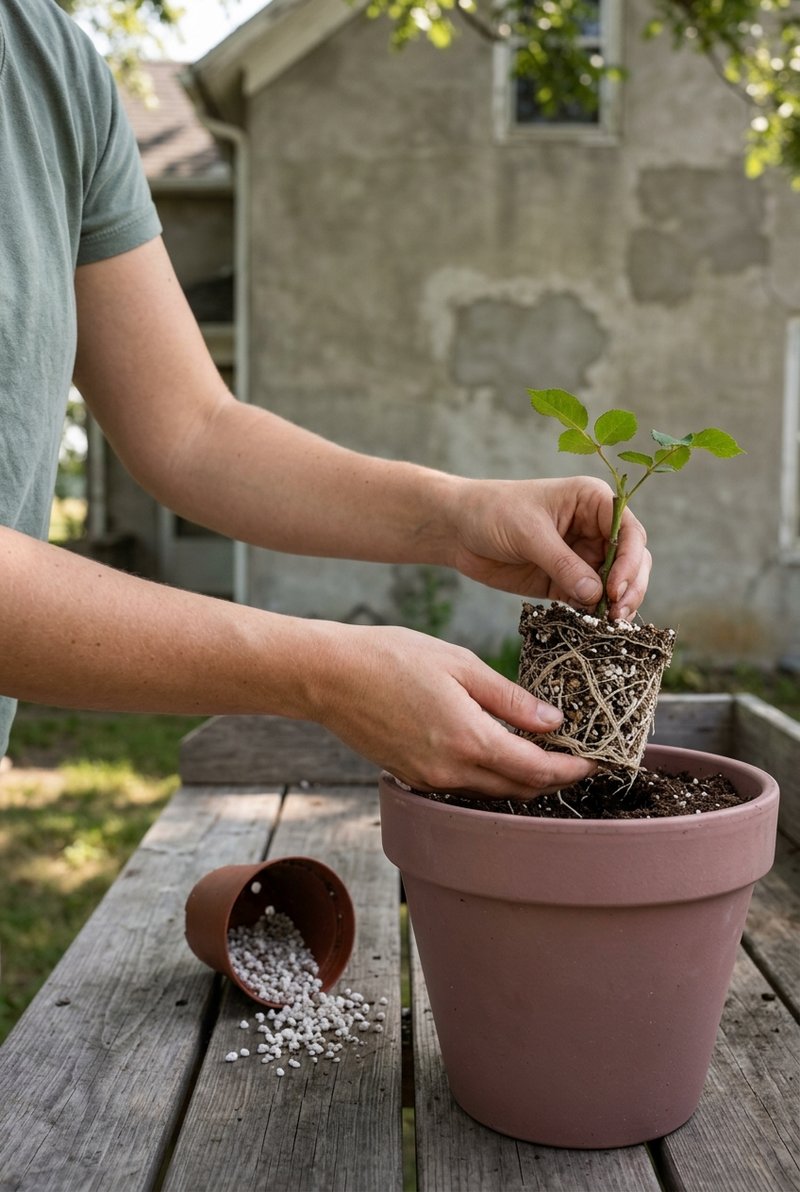
Once your cutting has resisted the tug test, don’t rush the transplant.
Give it another two to four weeks in its original pot to build a stronger root ball. Roots at first are hair-thin and fragile.
Move it too soon and you’ll break most of them.
When you do transplant, use a slightly larger pot (a 1-gallon / 4-liter container is fine) with real potting mix, not garden soil. Water it in gently and put the pot back in bright indirect light, out of the dome now but out of direct sun for a week.
Slowly harden it off over the next two weeks by moving it into a bit more sun each day.
This step matters. A rose that grew up under a humidity dome will scorch in an afternoon of direct sun if you skip the transition.
Your rooted cutting should stay in a pot for its whole first winter. Not the ground. Not yet.
In its second spring, once you see confident new growth, plant it out into the garden. This is when it stops being a science project and starts being a rose.
If you’re placing it near the house, my roundup of flowering shrubs for full sun has ideas for what to pair it with.
Once it’s in the ground and pushing new canes, some varieties respond well to a light dose of magnesium at the drip line. I’ve written about which plants actually benefit here: 12 plants that love epsom salt.
What My Second Batch Taught Me
My first batch was 12 cuttings and zero survivors.
My second batch was 14 cuttings and 6 survivors, which felt like a miracle at the time and now feels about right. The two things that changed were switching to terracotta pots and finally buying real rooting hormone.
The rose from my grandmother’s garden lived in a pot for two full years before I trusted it in the ground. It bloomed for the first time last spring, and yes, the fragrance hit before I reached the step.
Some things are worth six weeks of waiting.
If you liked this, my poppies from seed guide is another “from almost nothing” flower project that’s easier than it looks.